Designing and building a custom keyboard to meet user needs.
This is my current personal project, the ergoTHWACK: a custom mechanical split ergonomic keyboard designed to meet meet my (and I hope some others’) user needs! I’ve finished the beta build (see the video above for a quick look), and am now working on v1. You can follow along with my design process for both so far below!
Github links:
My ZMK fork the ergoTHWACK is using, fixing a bug and adding a key to toggle cursor speed.
My computer use is pretty diverse: programming, CAD, collaborative whiteboarding, image editing, video editing, gaming, and so on… as you go through my portfolio, you may notice this variety! As such, my input devices, including my keyboard, are incredibly important for me to be able to do the things I do.
I used to use membrane keyboards, up until the past few years. I then decided to upgrade to a mechanical keyboard, for more tactile and audible feedback while typing.
My first mechanical keyboard was a basic full-size unit. My second mechanical keyboard, which really started me on my “keyboard journey” I suppose, is a commercially available split ergonomic design. I switched to this keyboard (unsurprisingly) for those ergonomics - the split allowed me to keep my arms at shoulder width, and the design included integrated wrist rests and an outward tilt to the keys - helping considerably with my increasing carpel tunnel discomfort. It’s backlit too, and given I have my room lighting on a schedule, this way I can always read the keys.

My current keyboard, the Cloud Nine ErgoTKL, with Kailh Box White switches.
However, there are some issues I have had with this keyboard:
After years of using membrane keyboards, I’m still not used to how far keys go down when pressed on mechanical keyboards with standard switches.
It’s wired, which clutters up my desk.
The switches on this and my first mechanical keyboard both have had a low pressing force to activate the keys, requiring an uncomfortable amount of effort to keep my fingers from pressing them while my hand is resting.
Some applications that combine the use of the left hand on the keyboard, with the mouse in the right hand, use keys on the right side of the keyboard, most notably the delete key. This means I have to move my right hand back and forth between the mouse and the keyboard, which can be a nuisance. This also comes up when moving quickly between typing and pointing, especially annoying when the pointing is minimal and not too precise, e.g. when editing a document.
These issues became my primary design goals:
Find switches that go down less when pressed (have less travel).
Make the keyboard wireless.
Get switches that have a higher pressing force required to activate.
Integrate the mouse functionality into the right side of the keyboard, so I can accomplish a good chunk of mouse use without moving my right hand.
Move certain keys on the right side that I still need while my hand on the mouse, over to the left.
These goals were in addition to the things I like about this keyboard that I want to keep:
The split design
The outward tilt - known as “tenting”
The key backlighting
The rotary encoder for volume
There are a large number of enthusiasts online that design and build mechanical keyboards. Of the split ergonomic designs, many are designed so that the user remember multiple “layers” on their keyboards, each with different actions per key, reducing the total number of keys on the keyboard.

An example of a reduced split keyboard layout, the Corne GLP, which I used as a reference for this project.
As a neurodiverse individual, I doubt I could effectively keep track of these “layers” in different use conditions (I would guess a good number of other people have this doubt too, keeping them away from these keyboards), and so I needed to find a design that would have enough keys, including all the ones I regularly use.
Additionally, applications and games that use the left hand on the keyboard and the right hand on the mouse all assume a typical US keyboard layout, and so key combinations (CTRL+F,C,V,Z etc.) and WASD game controls would be a nuisance with a key layout that was too dissimilar to the standard.
There were two things I did really like about most of the ergonomic designs:
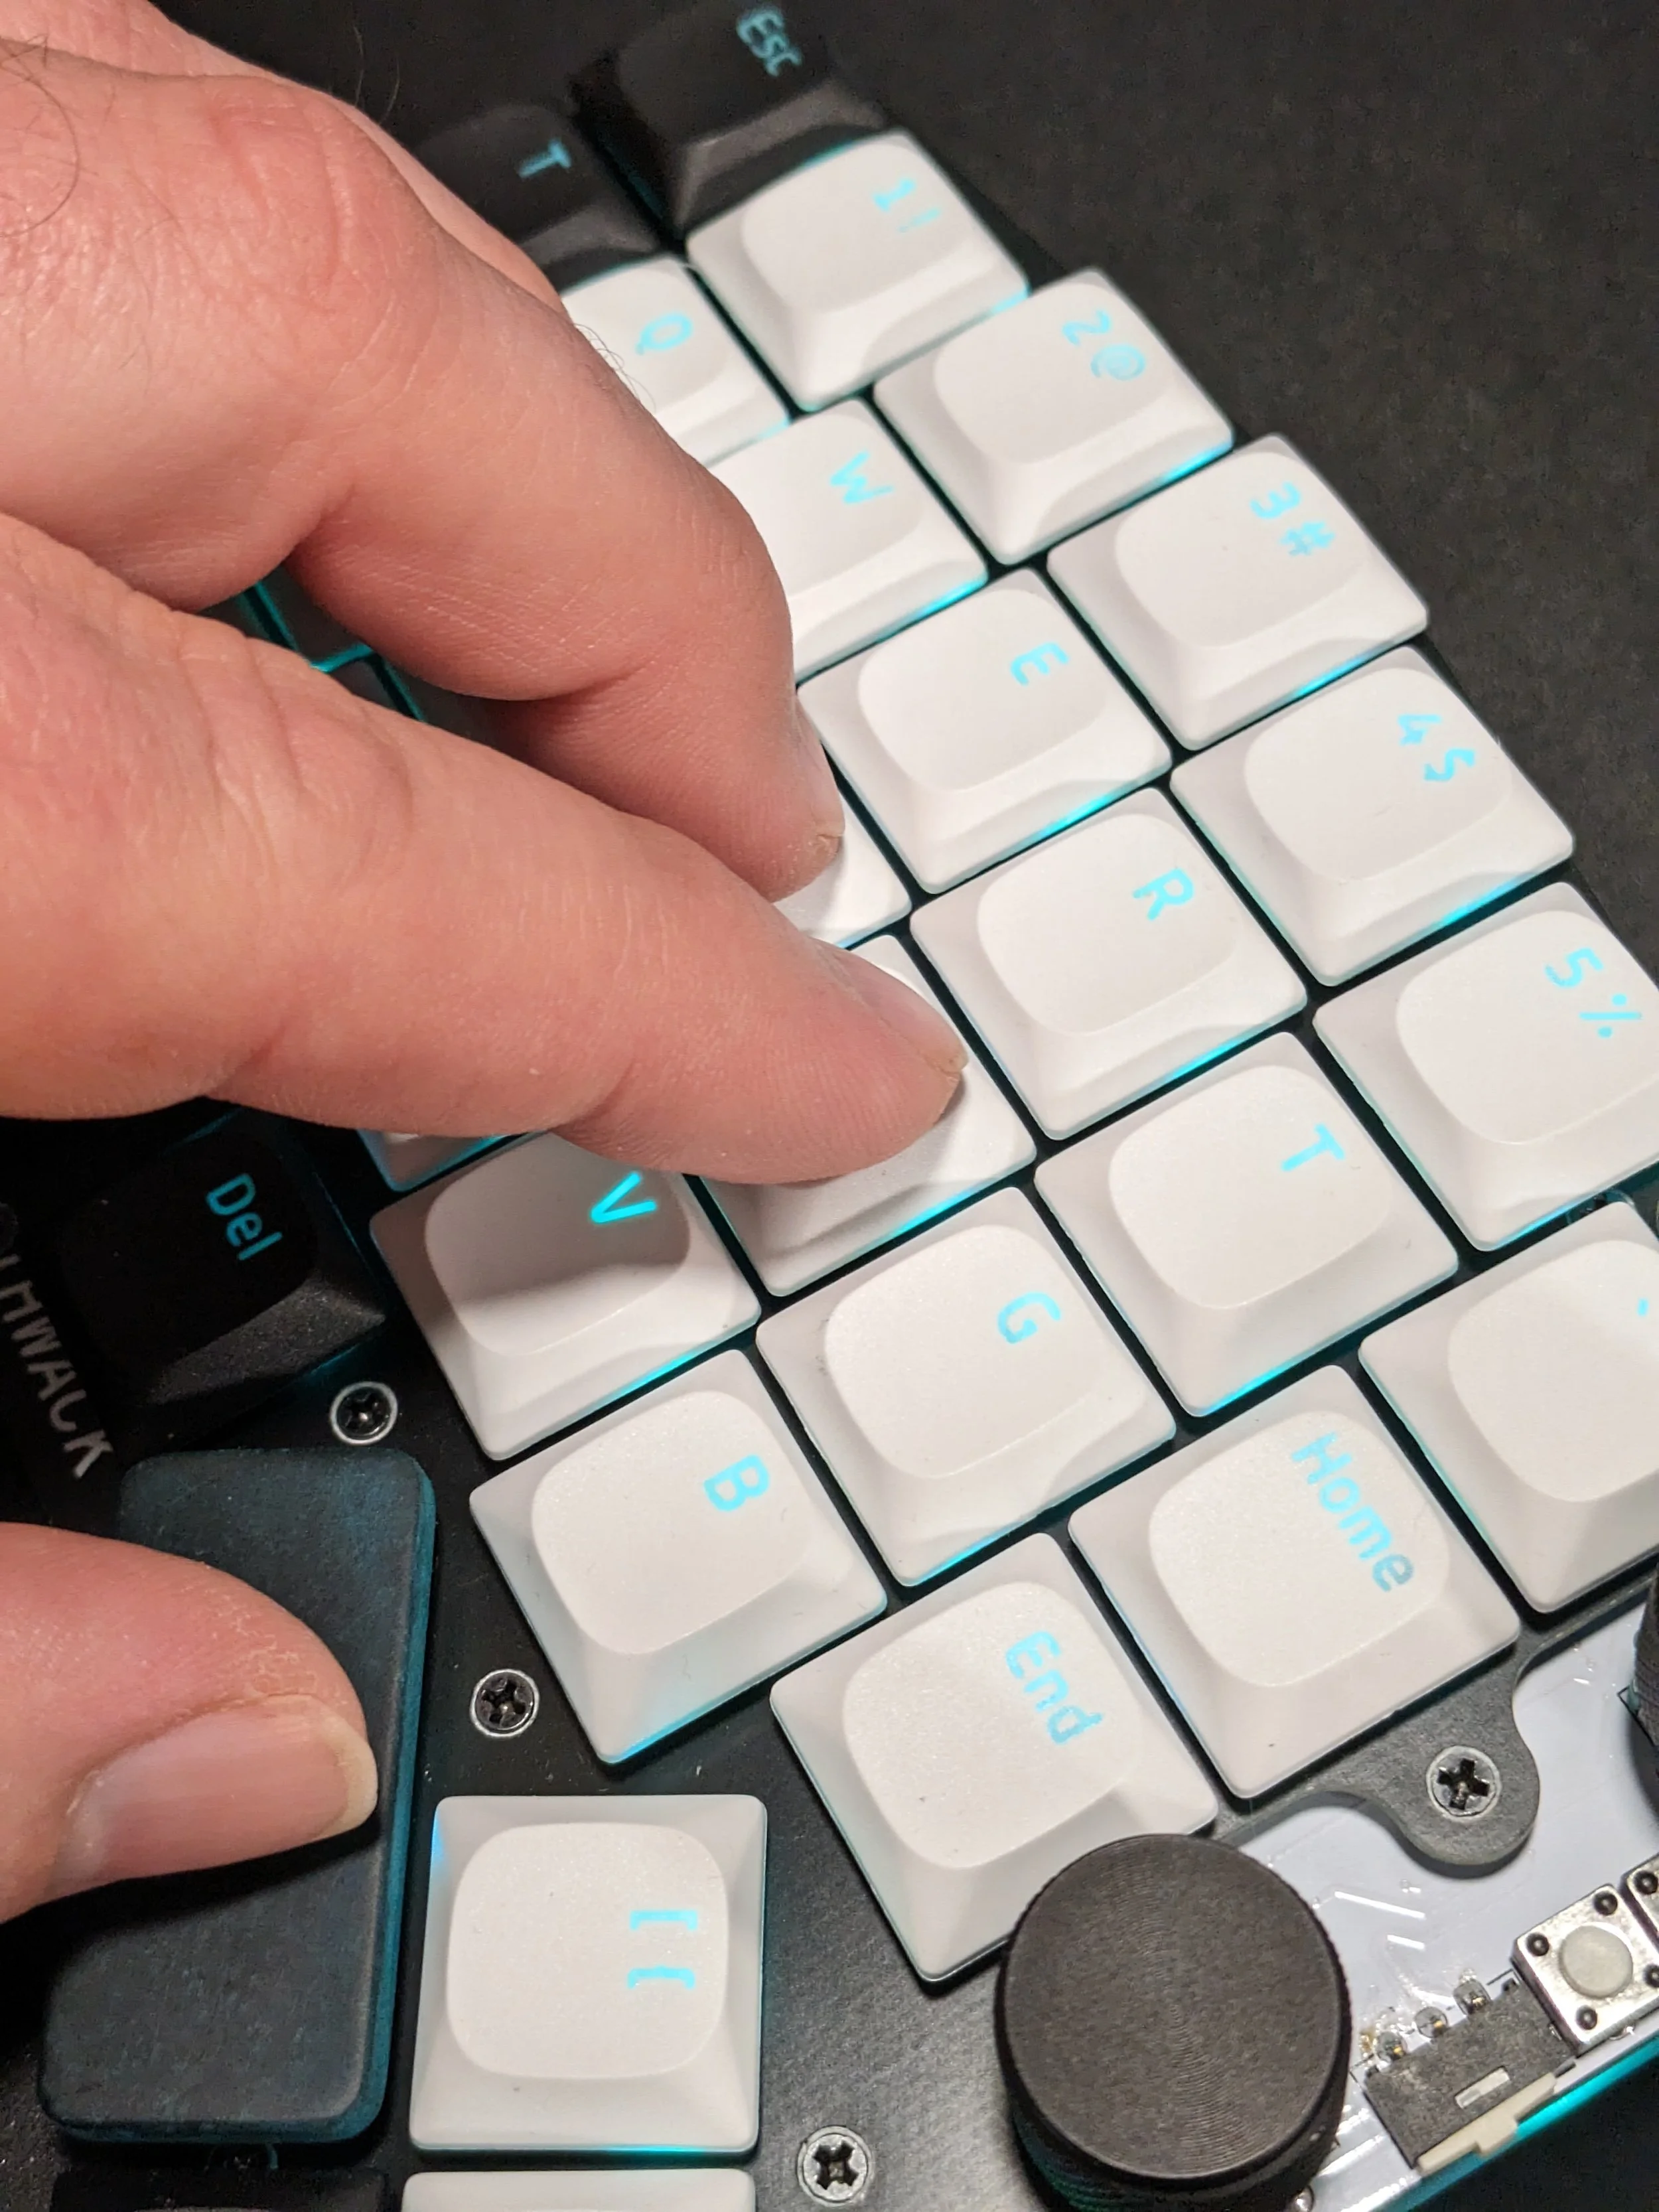
The columnar layout - meaning each finger on the keyboard would mainly just need to travel up and down on a column of keys, eliminating additional side to side motion necessary on a traditional keyboard.
The staggering in the rows, accommodating the different lengths of each finger.
Thus, I added these to my design criteria.
After researching, I found the design that looked the most promising for me, with a large and mostly normal set of keys: the ErgoDash.

Omkbd’s ErgoDash, as seen on GitHub.
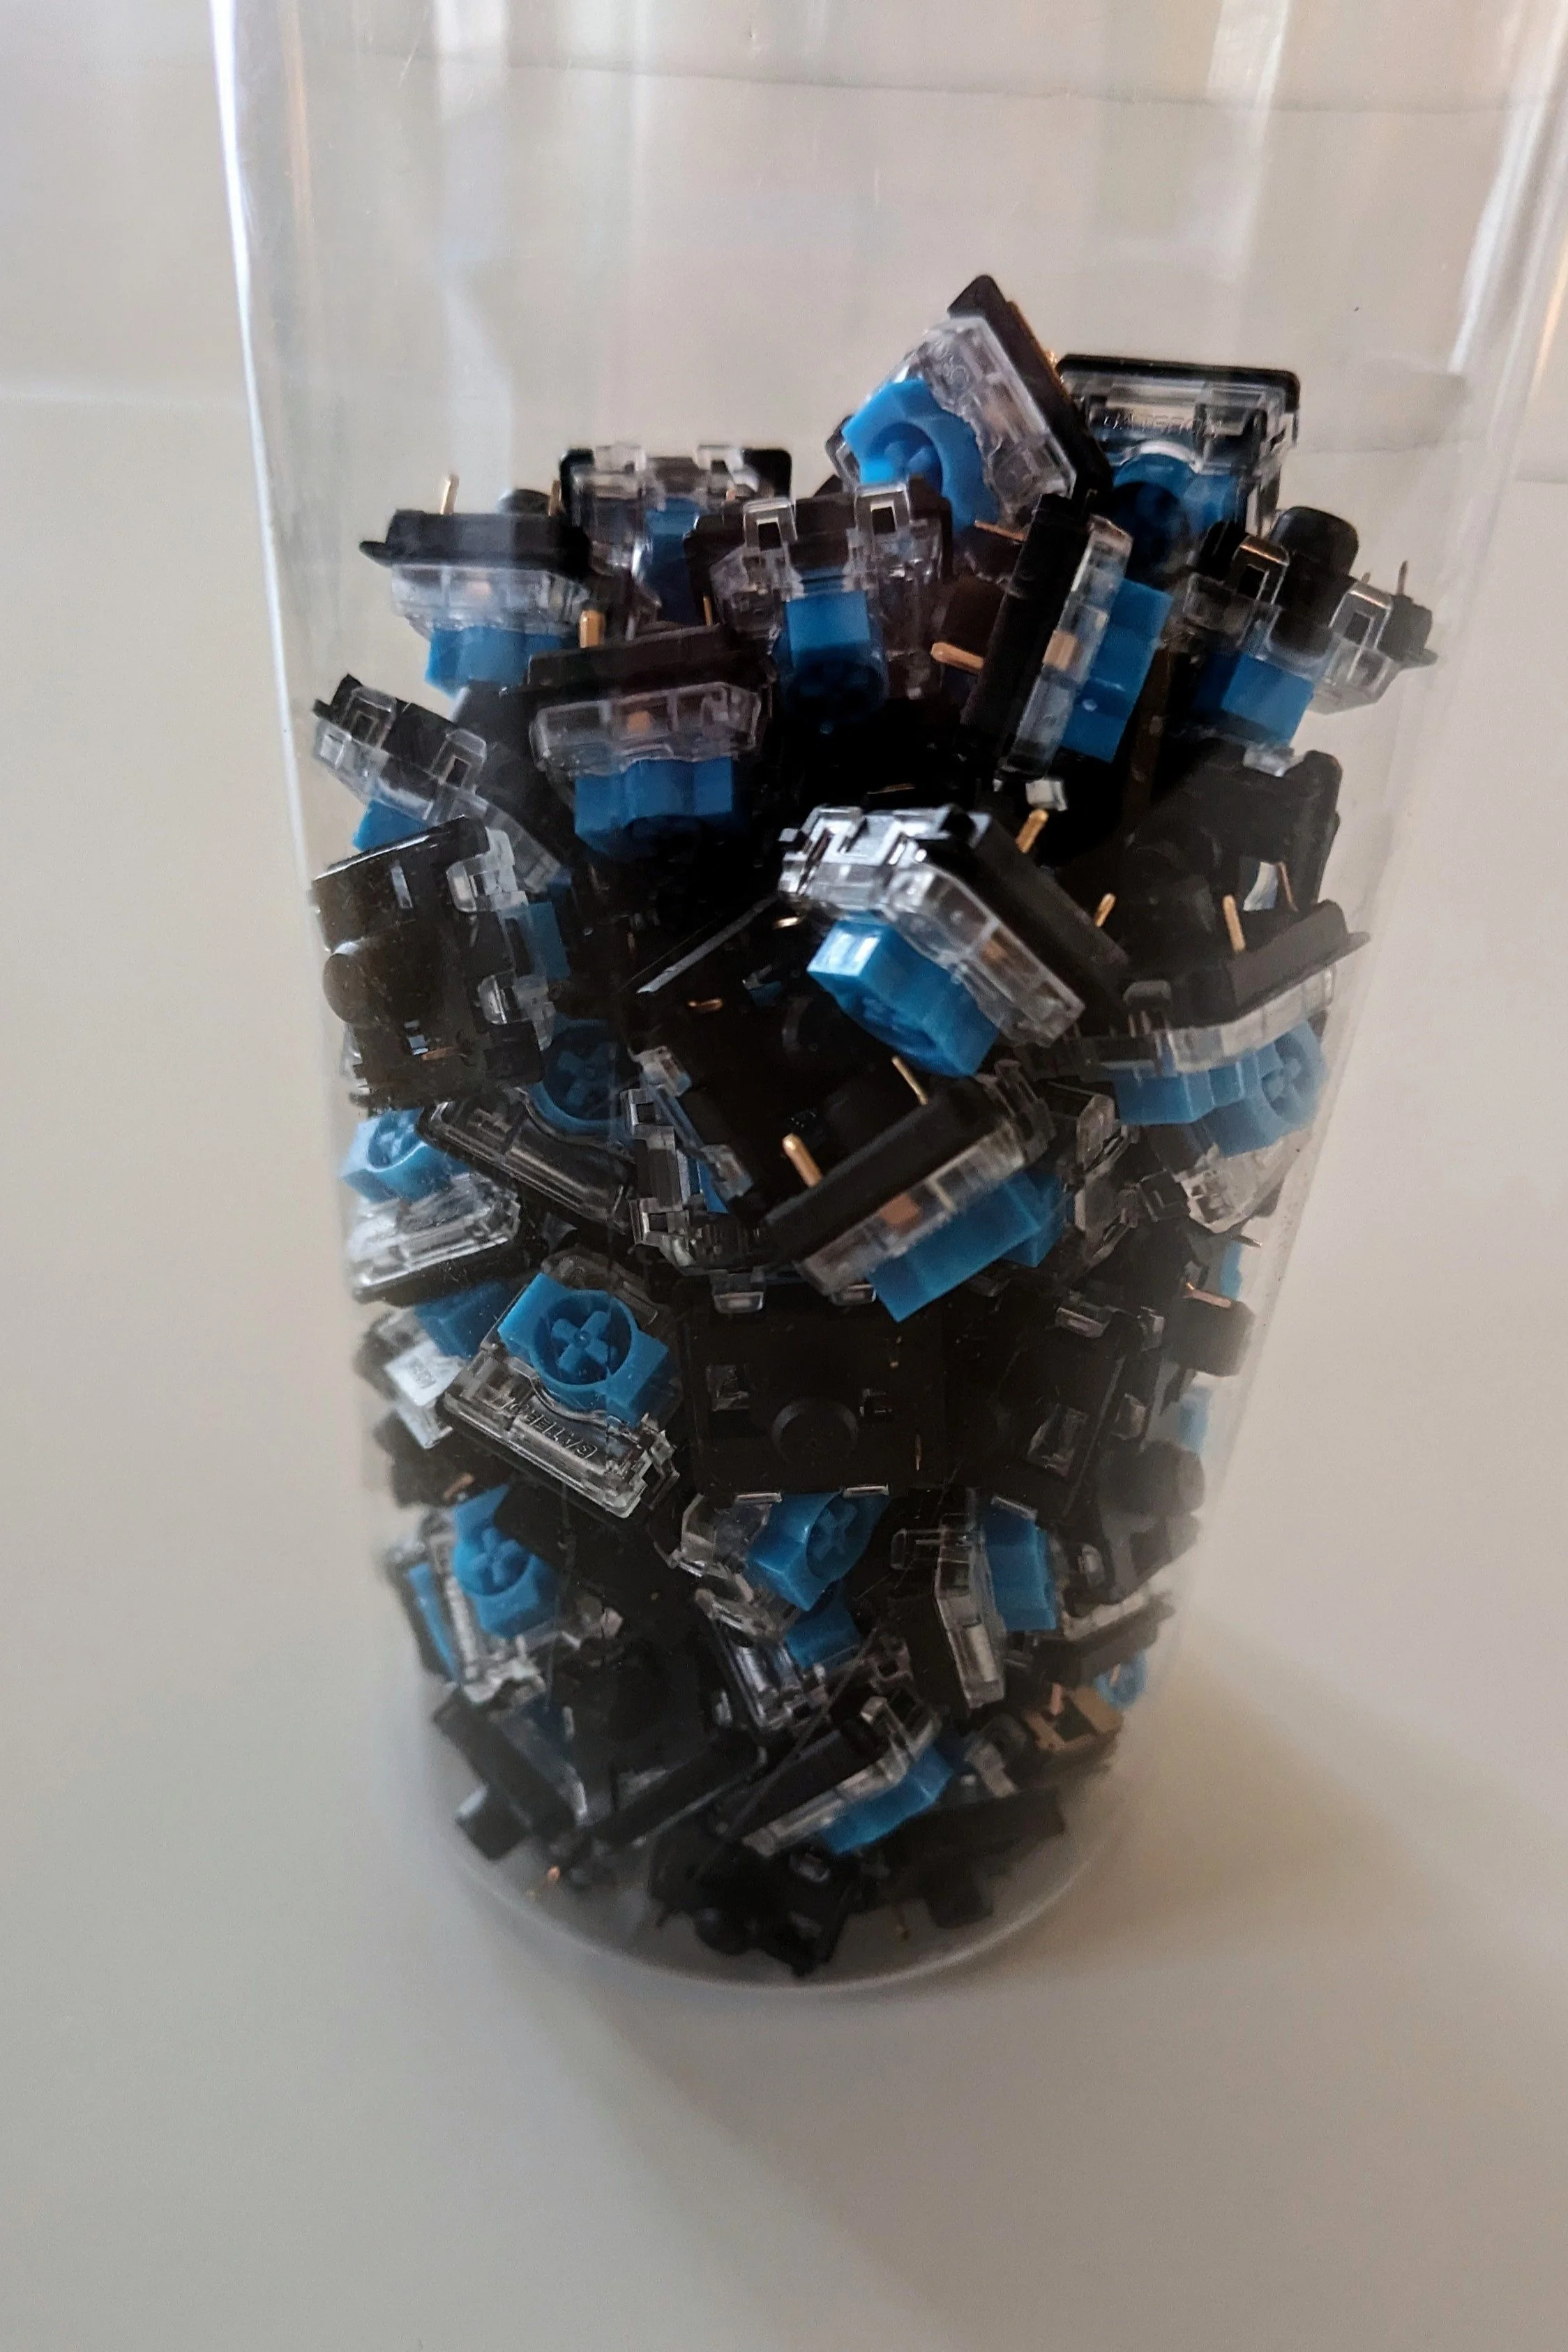
For the switches, it wasn’t difficult to find switches that had higher activation force and less travel with the resources the community has put together, and I arrived at the Blue (clicky) and Banana (tactile, higher force) Gateron KS-33 low-profile switches, with 44% more activation force and 17% less travel than the Kailh Box White switches I had been using, and able to accept standard MX-style keycaps, unlike the better known, but more expensive and poorly stocked Kailh Choc v1 switches.
Unfortunately, the ErgoDash is designed to accept standard mechanical switches, which I don’t quite like, as I explained above. It was clear that to get the keyboard I wanted, I’d need to design it myself.
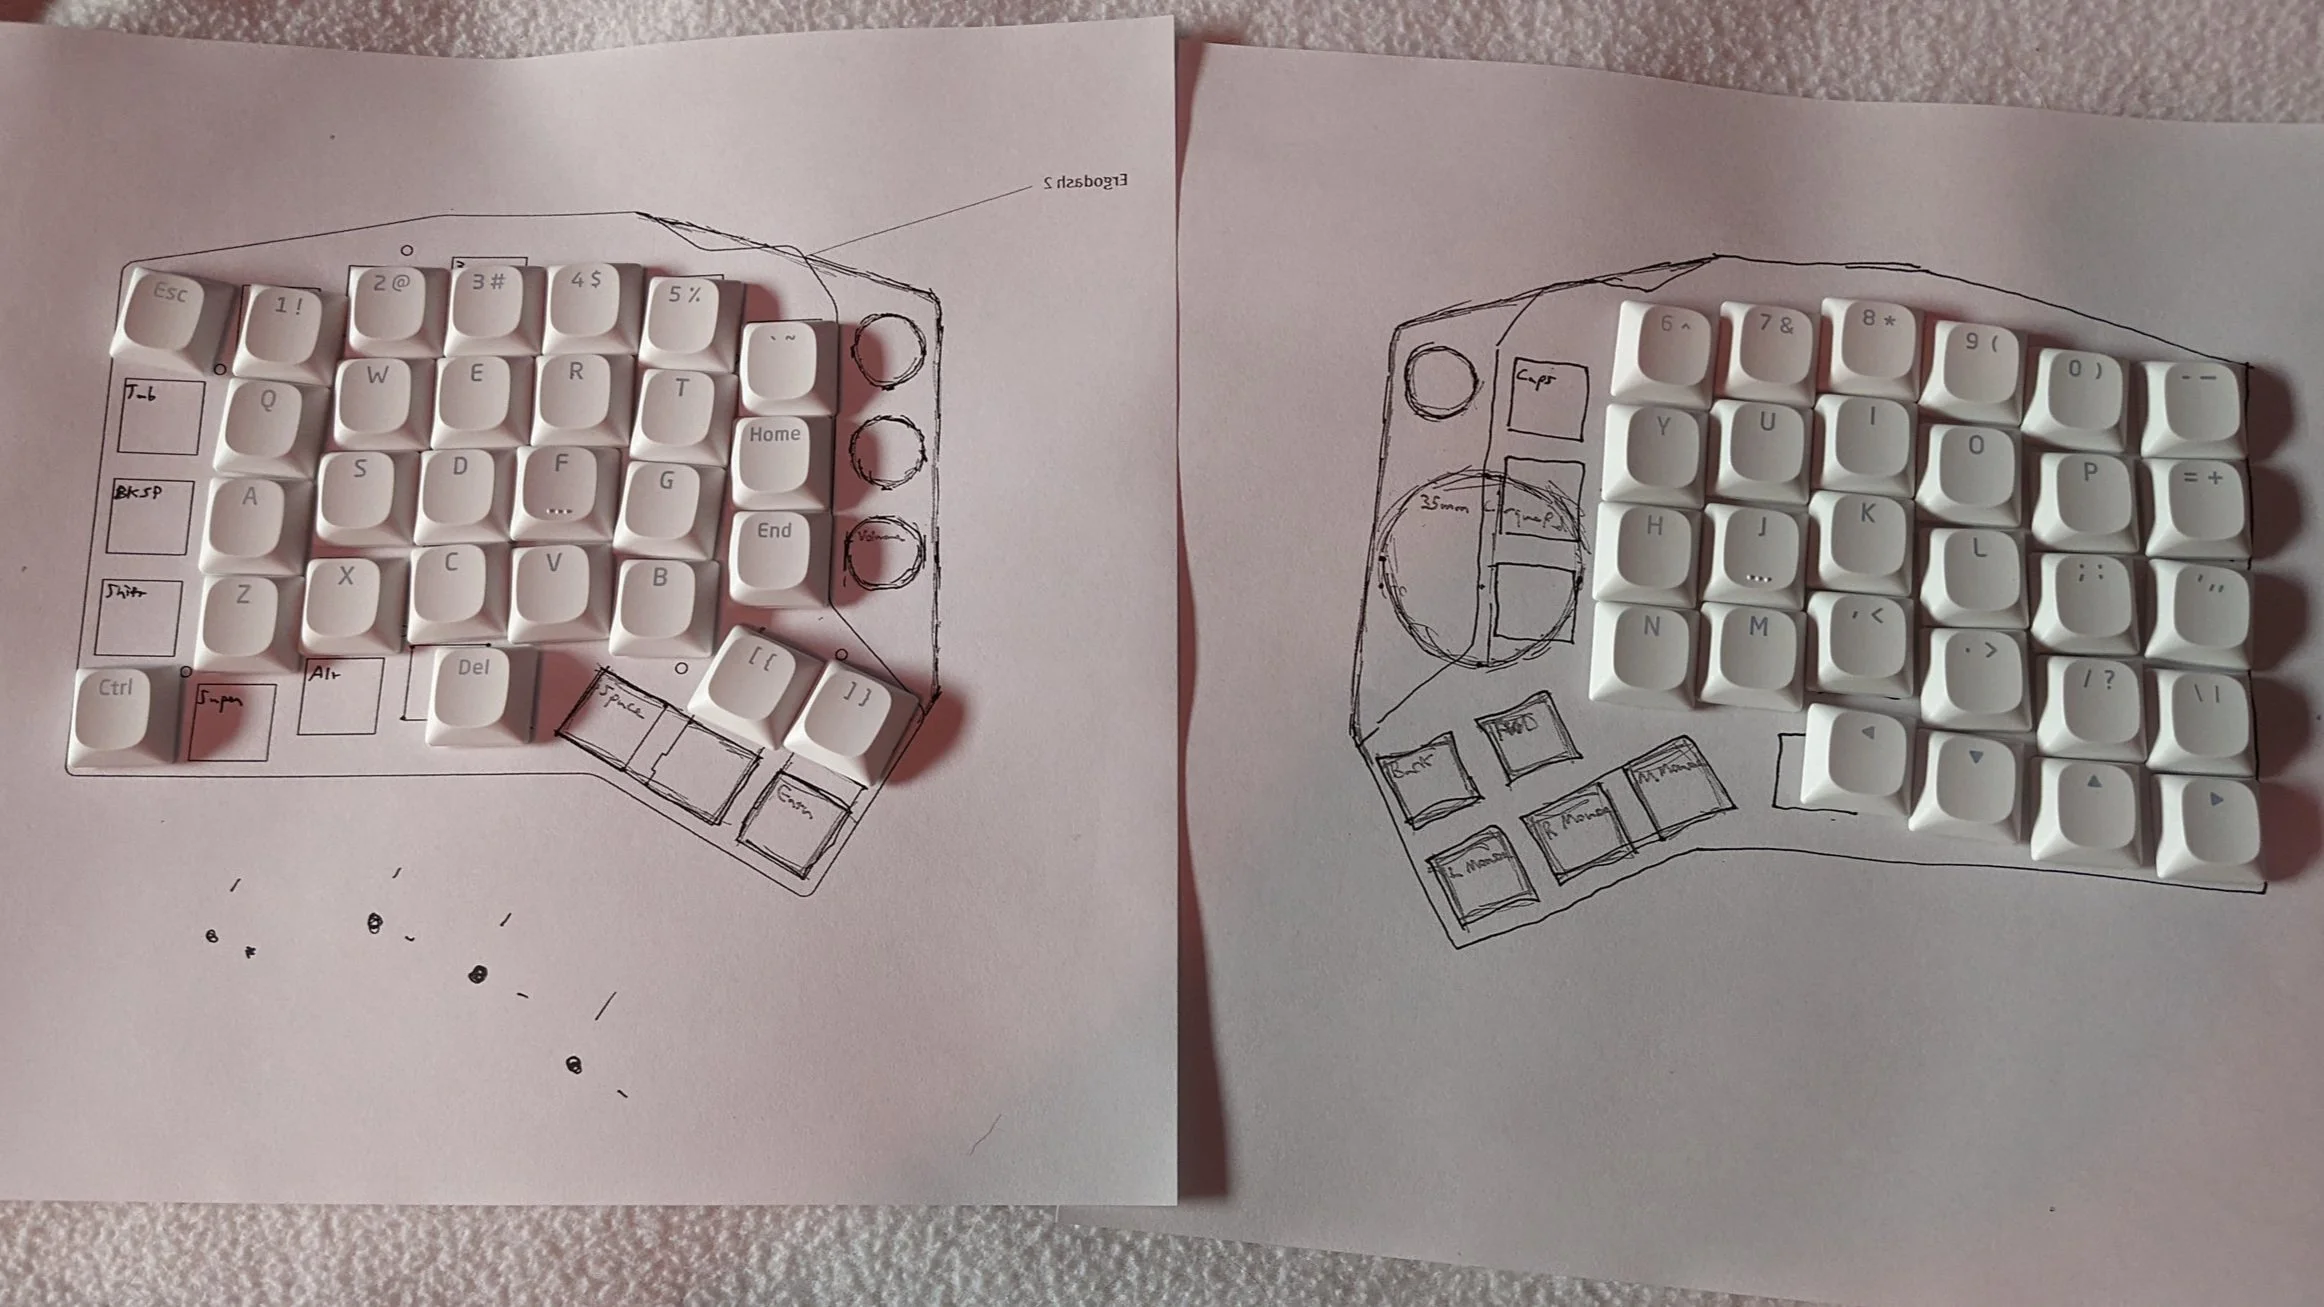
With this starting point, I experimented a bit with cardboard and paper on the design and layout to figure out what would work best for me.

One of my experiments with key positions and tiering using lowfi paper and cardboard prototypes. This site has copies of different keyboard layouts that helped with this.
I had a general idea of the keys that I use the most, and so I pared down the keys I wanted to include. I found a locally-running python applet for logging my usage of different keys, and the data from this confirmed my hypothesis.

Some key combo data in my key use log.
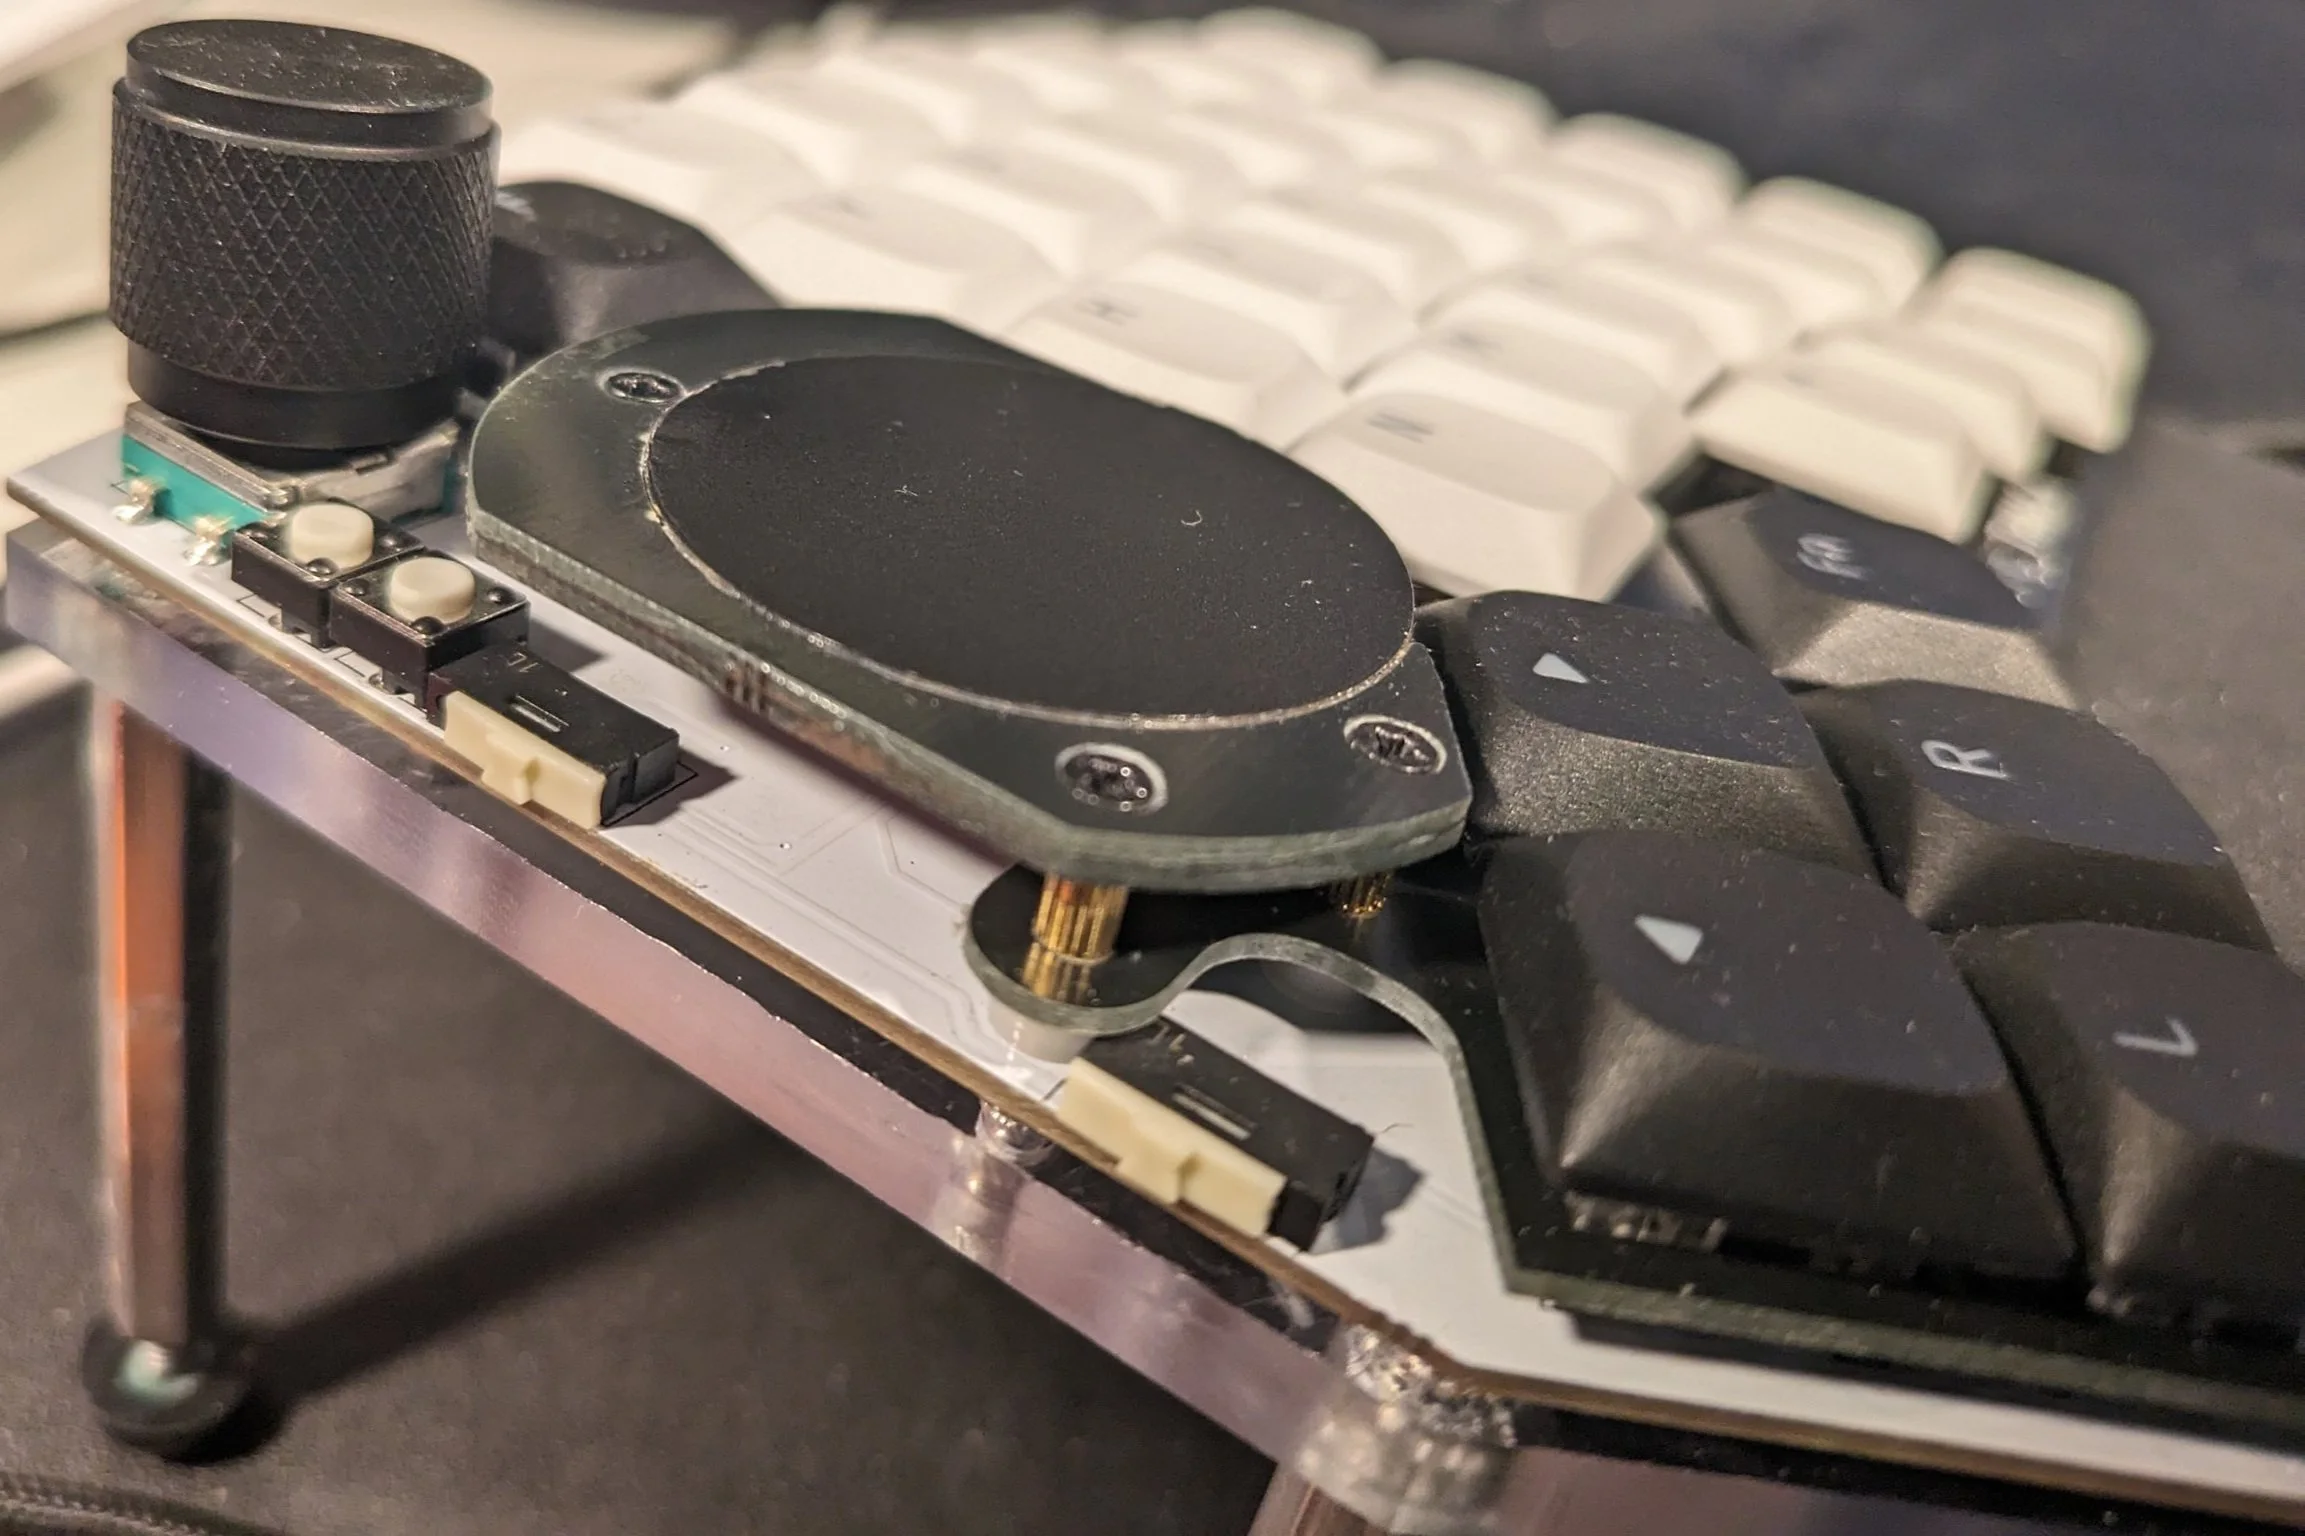
With the keys I needed generally established, I could come up with a key layout prototype on paper based on the ErgoDash that would work for me for typing, gaming, programming, graphics editing and so on. I found the space on paper to add in rotary encoders and a 35mm round trackpad, both absent in the ErgoDash design but in my design criteria, for volume, mouse, and other control possibilities.
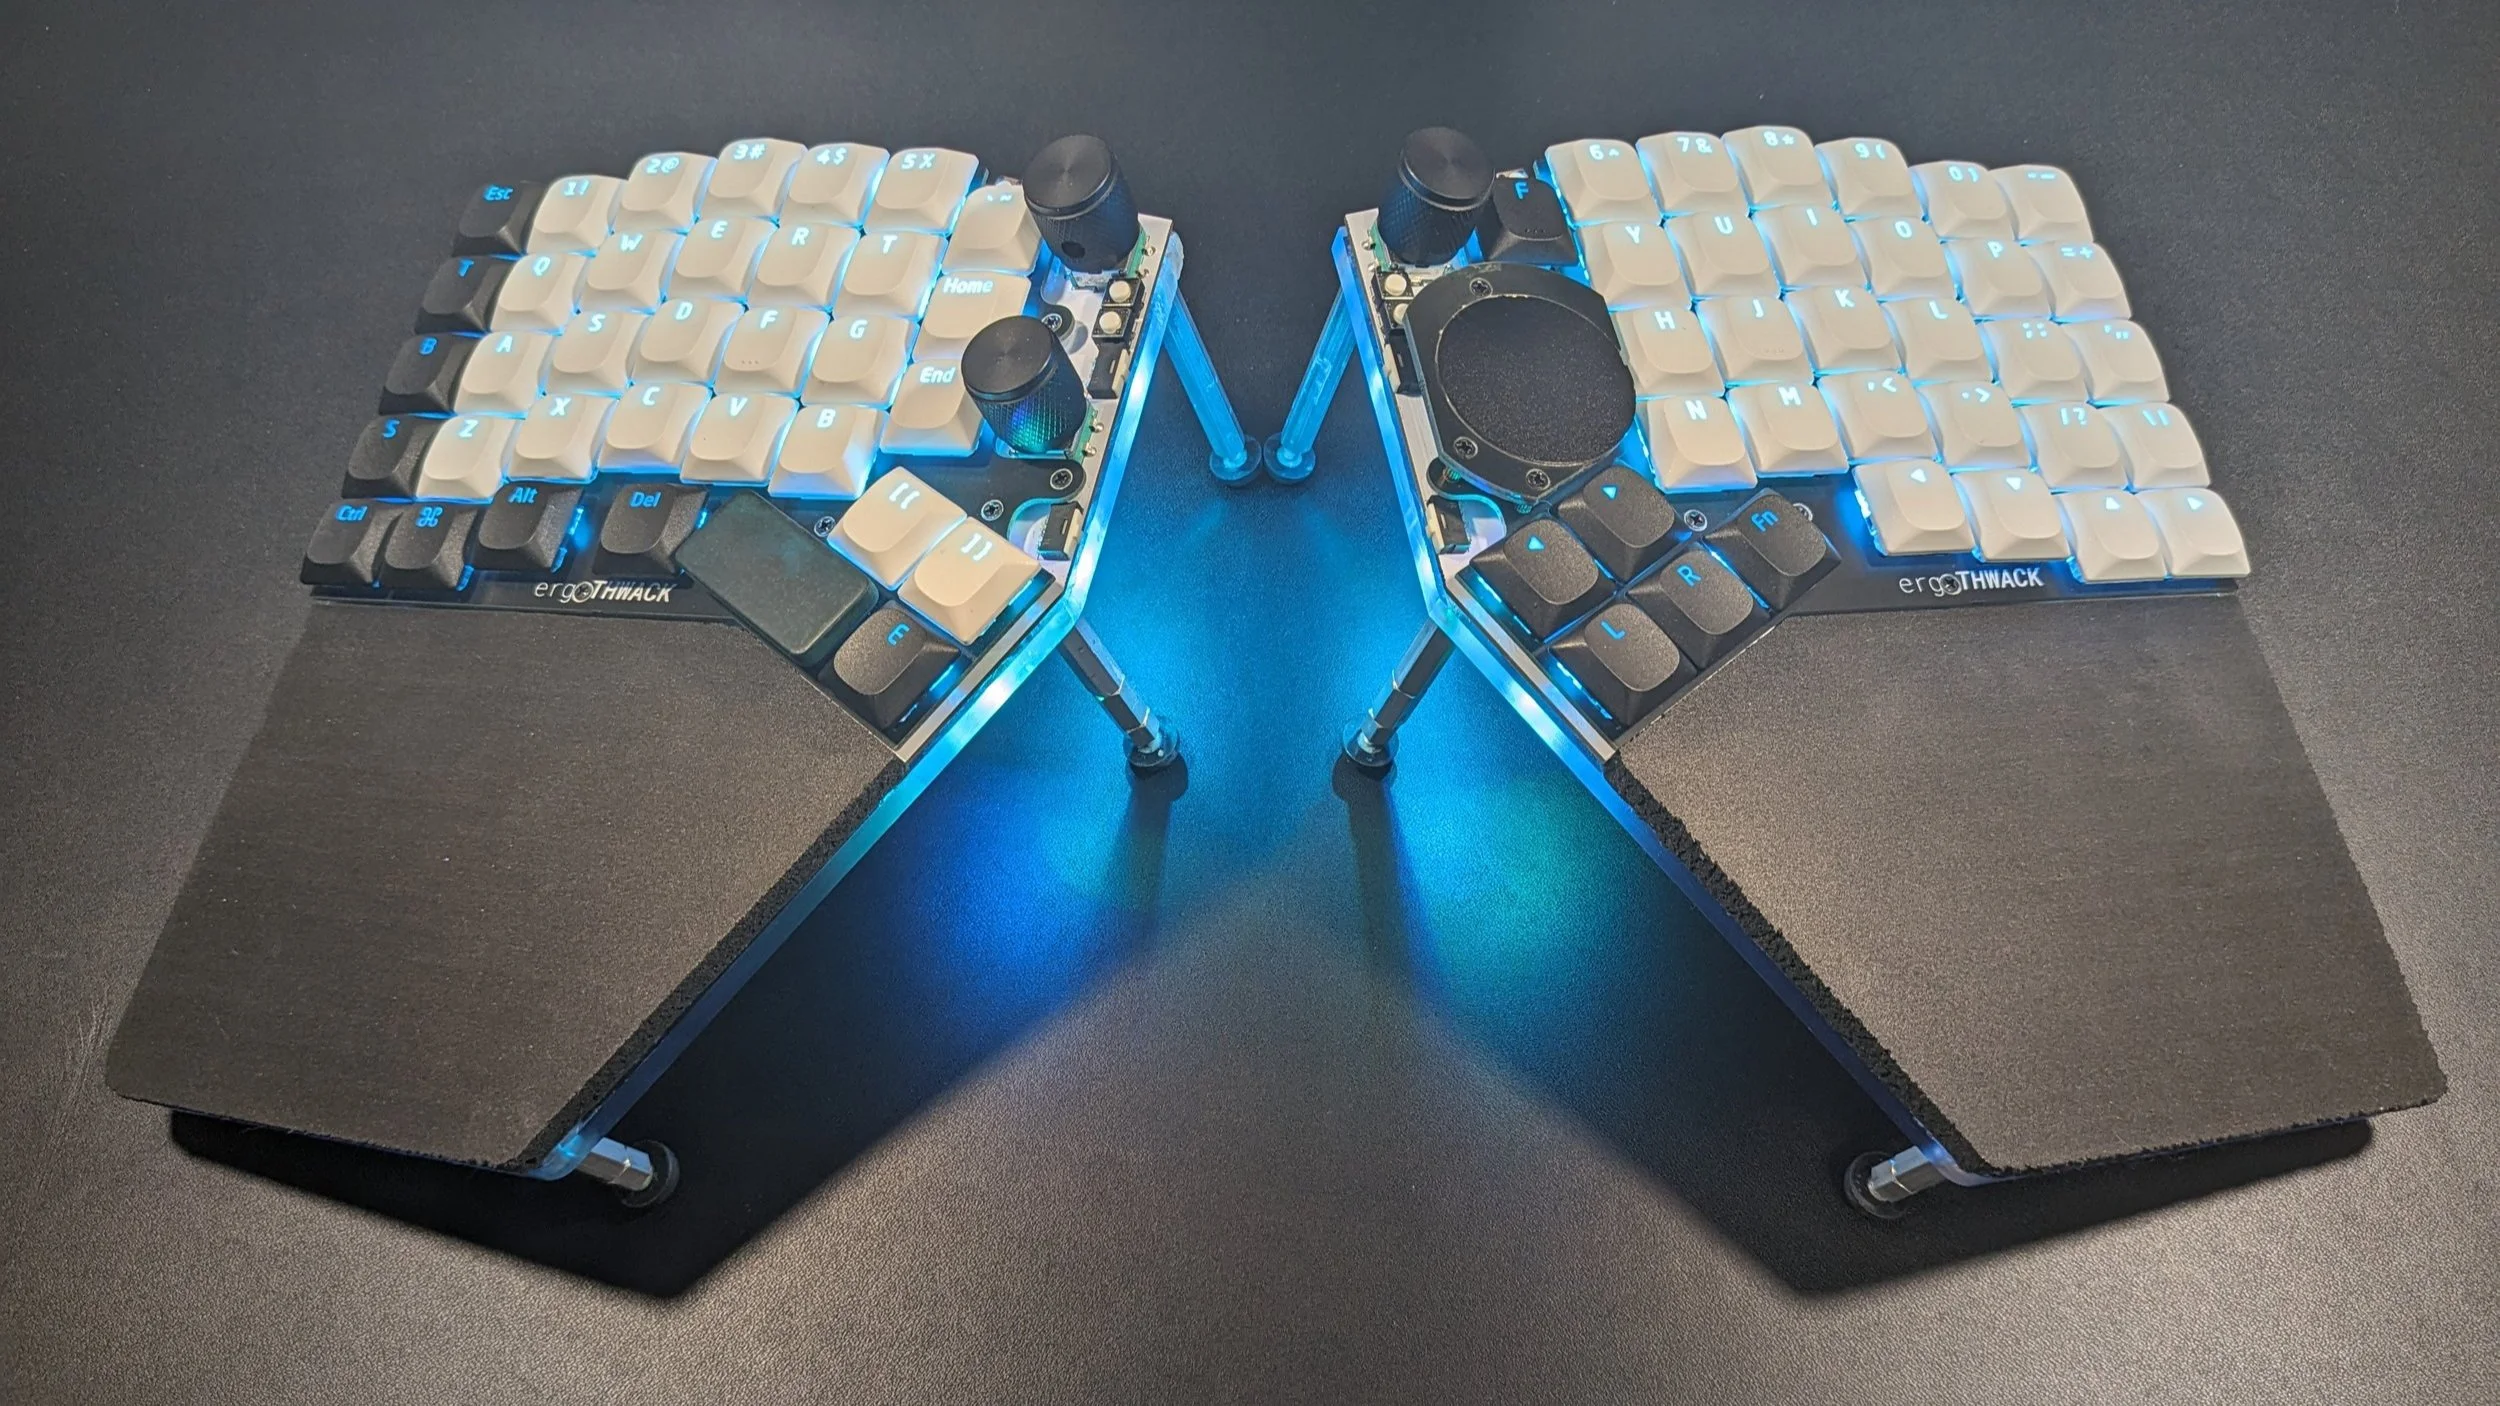
I noticed that when my hand was in the WASD position for gaming on the sheet, the spacebar was no longer under where my thumb would naturally press, even though it was when my hand was in typing position. So I added a double-width (2U) spacebar to the left side, which I decided, given its thwackability, would be my design’s namesake. This was no longer an ErgoDash, it was the ergoTHWACK.


To make the design wireless, I decided to use what appears to be the leading wireless controller board in the community, the nice!nano. I did a sanity check on paper against the board’s pinout to make sure all my peripherals could be connected, and picked out a 10000 mAh battery to hopefully give each side a decent runtime, even with backlight LEDs for all the keys and underglow.
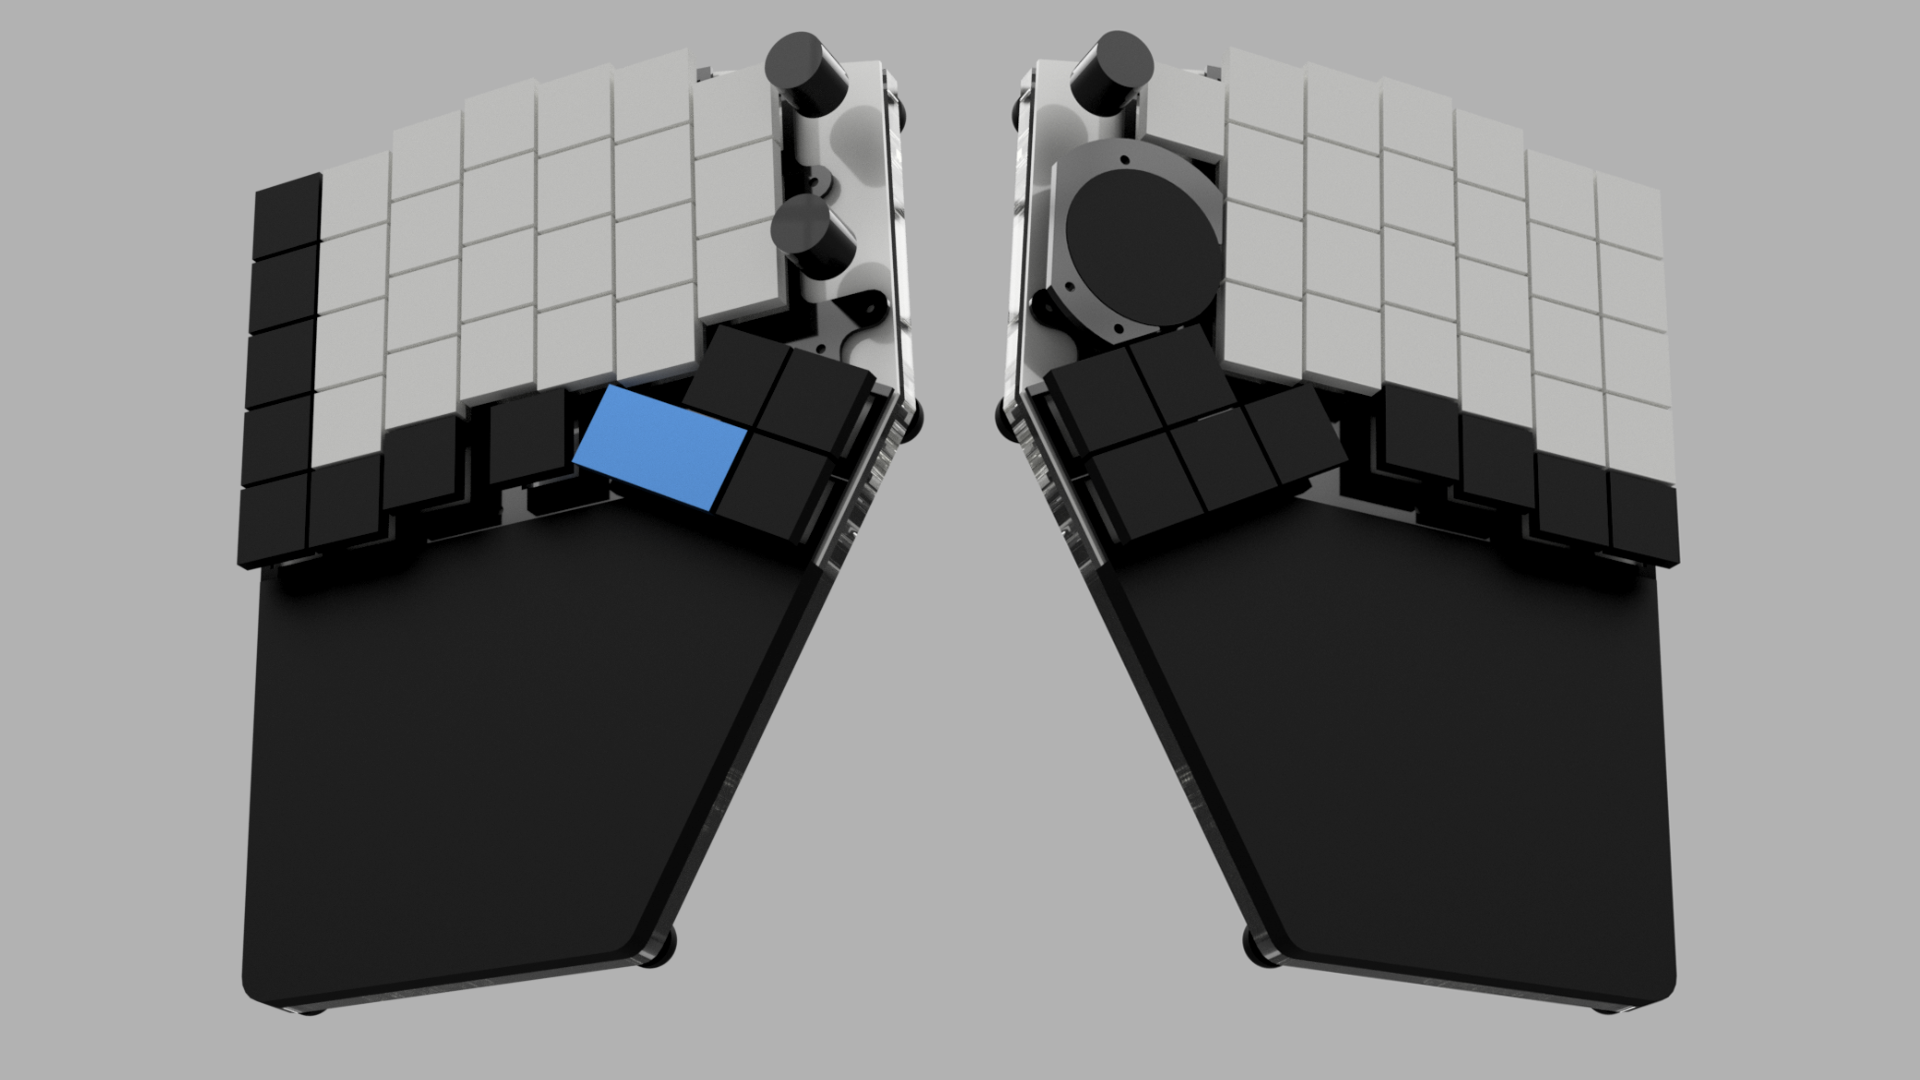
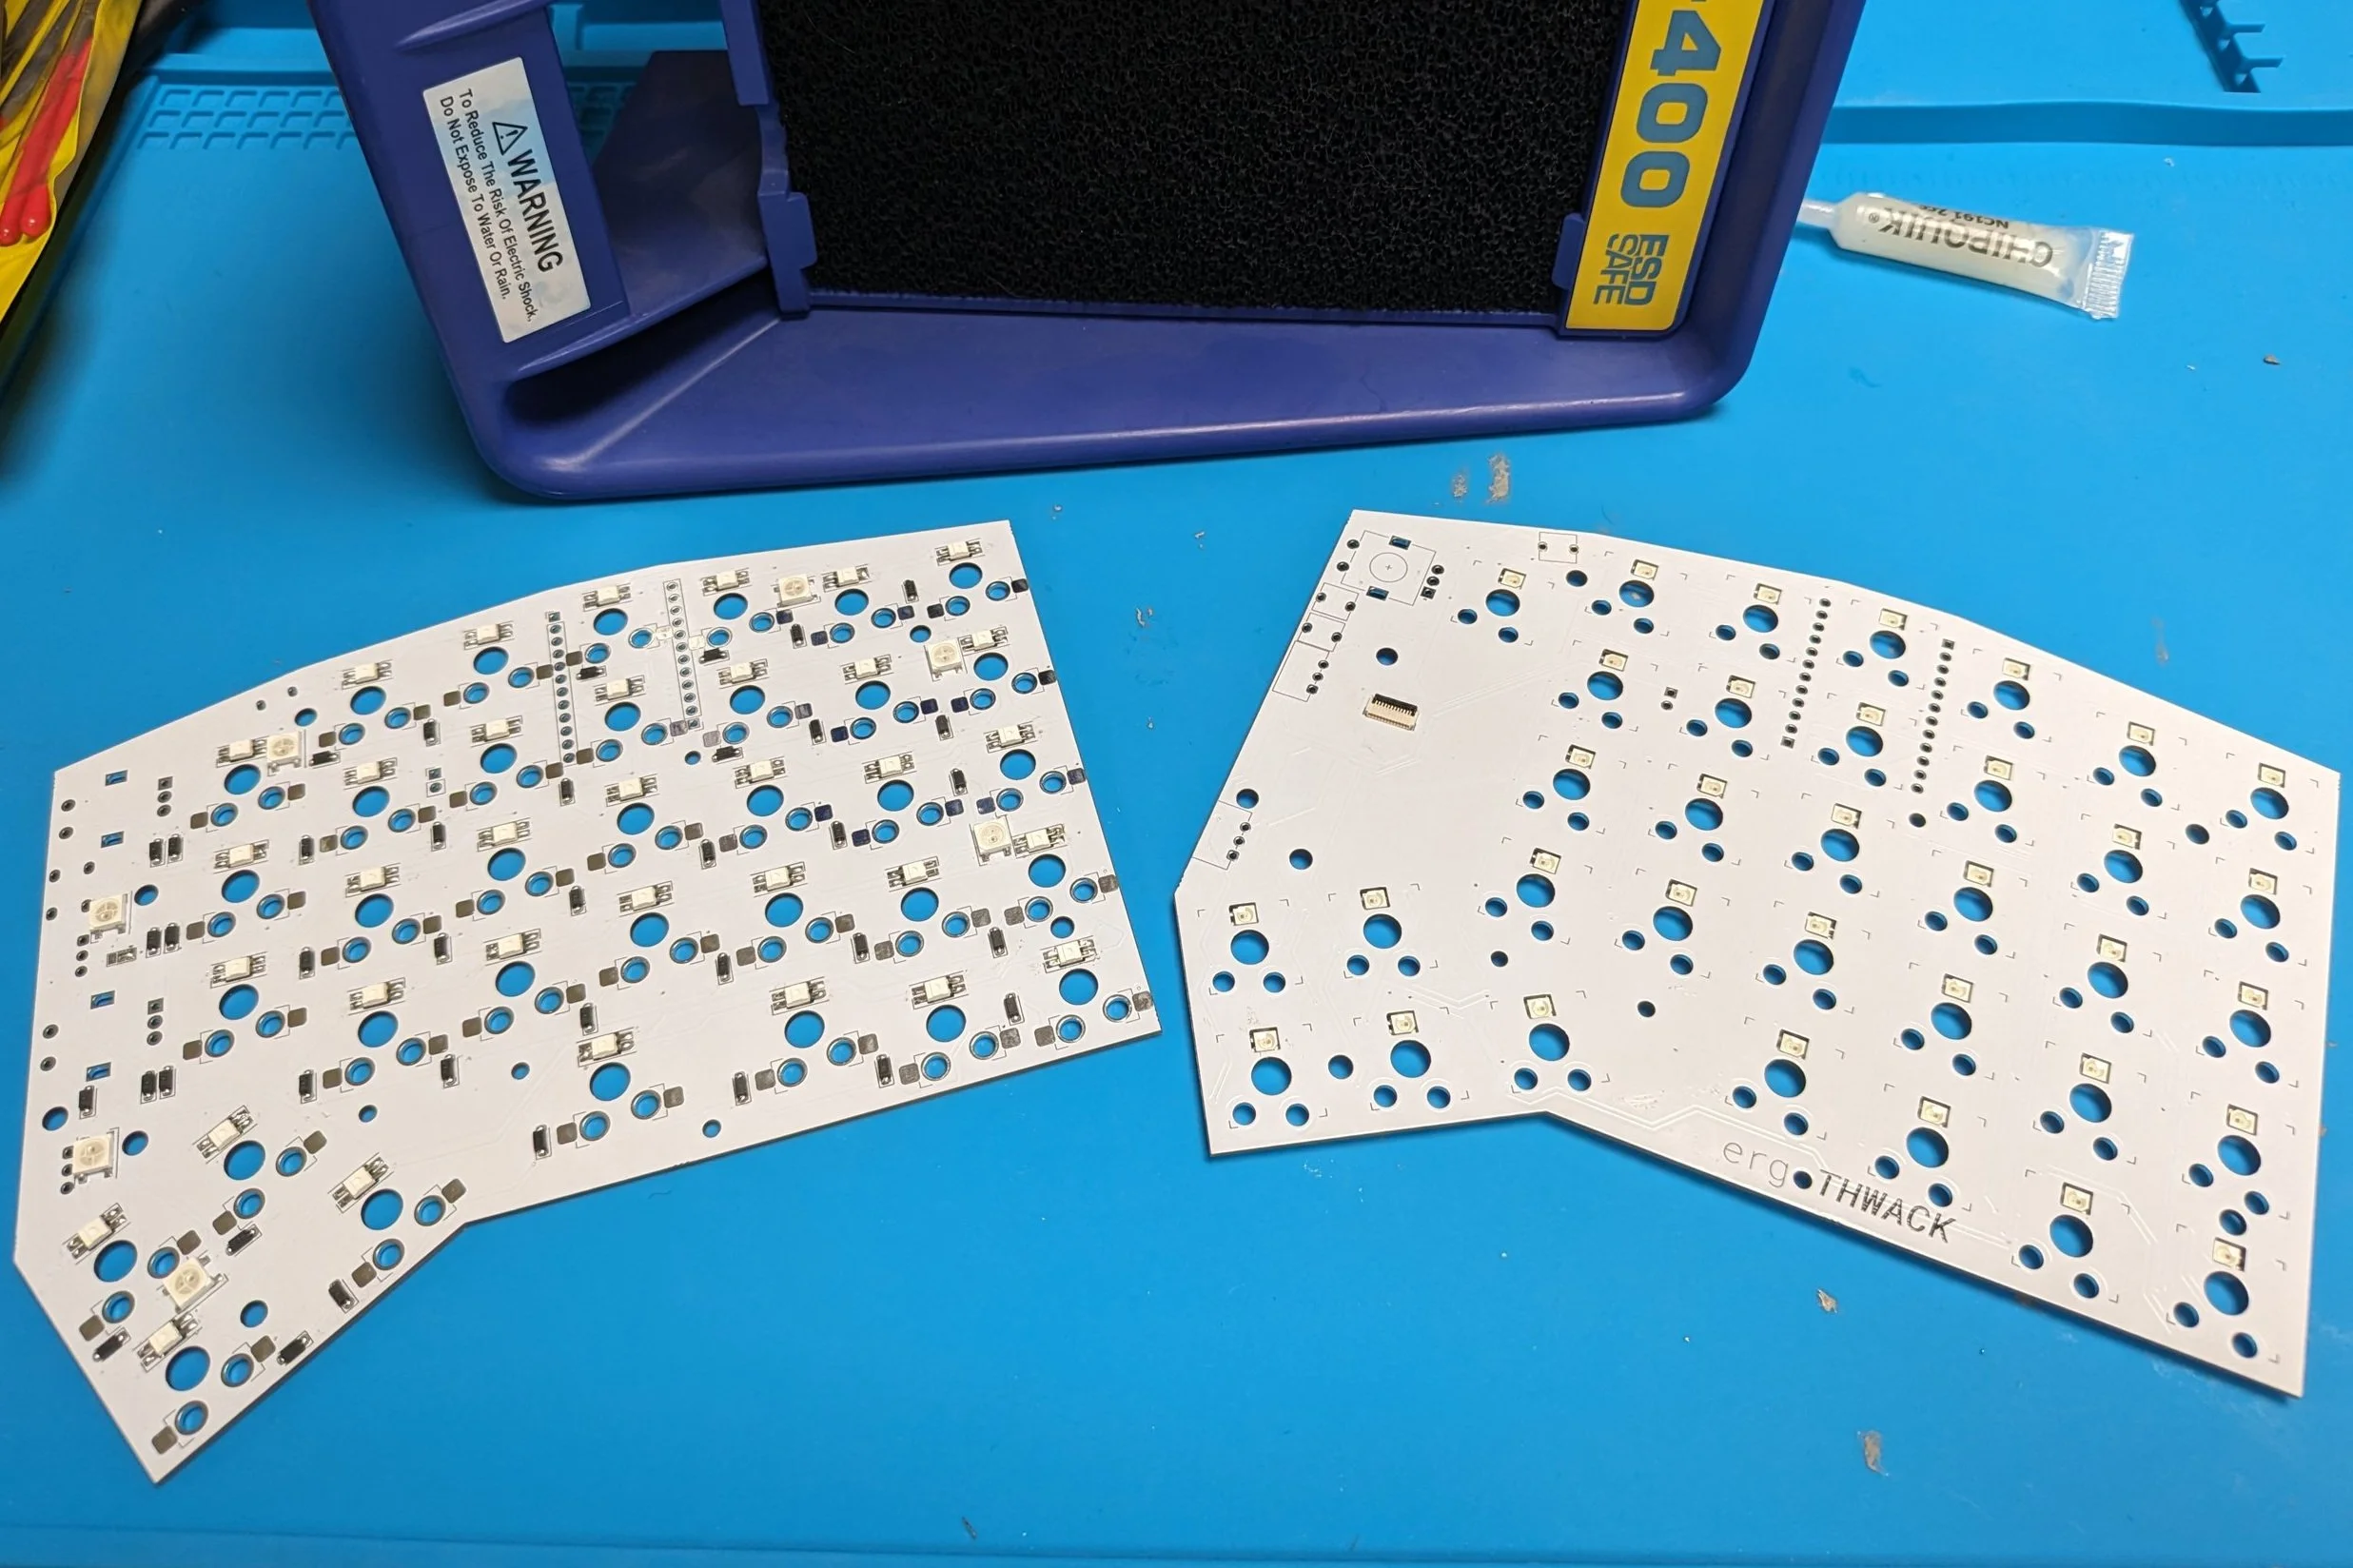
Using Adobe Illustrator, I took the layout of the ErgoDash PCB, the footprint of the large battery, and composited them, figuring out a preliminary shape and mounting hole positions of my PCB, top plate, base plate, underplate, and wrist rest that was possible to package and assemble.
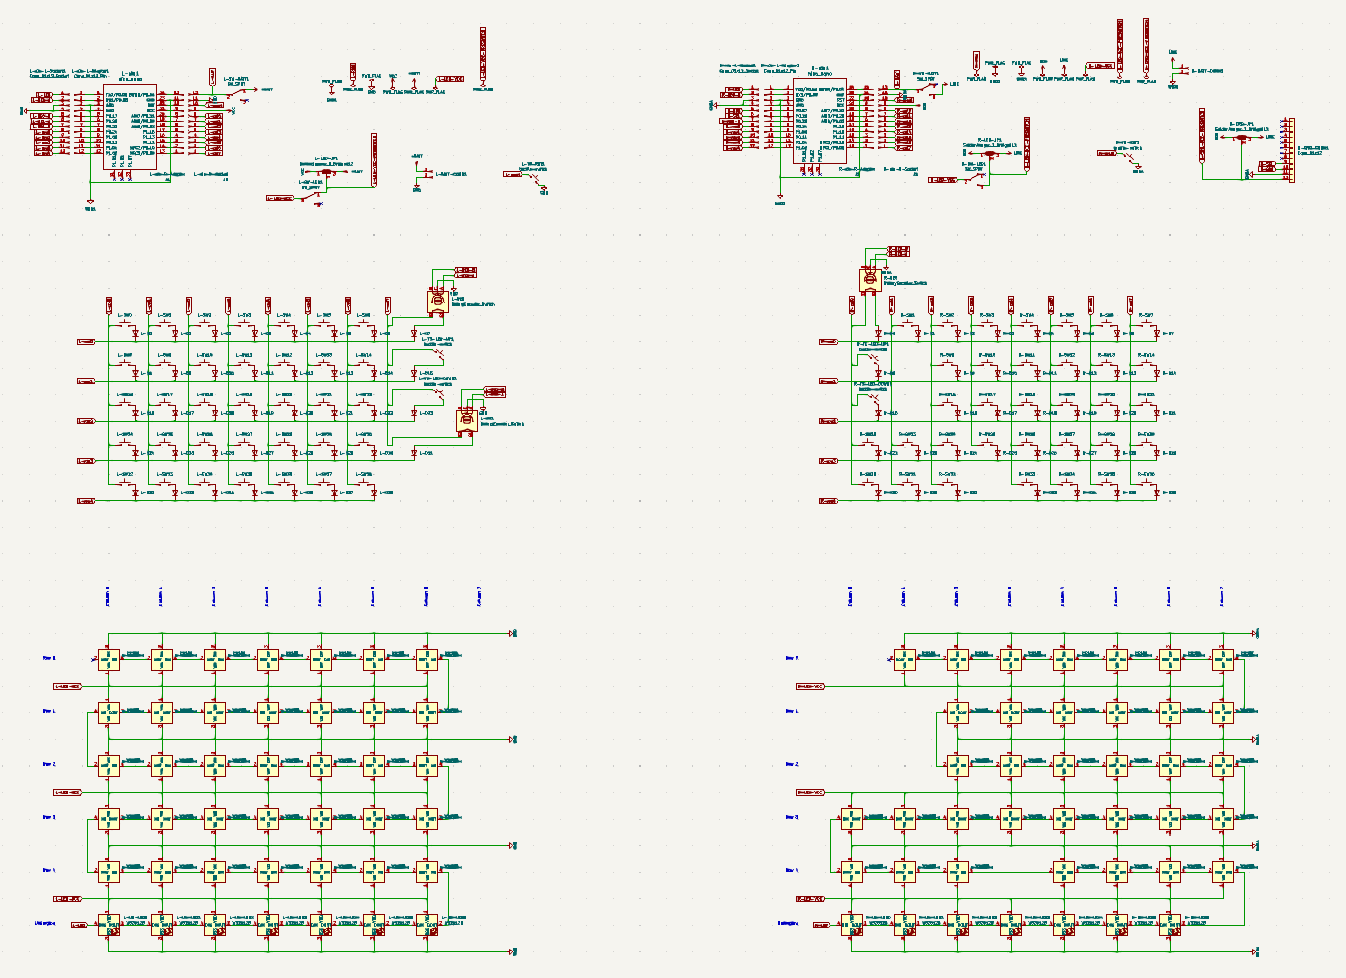
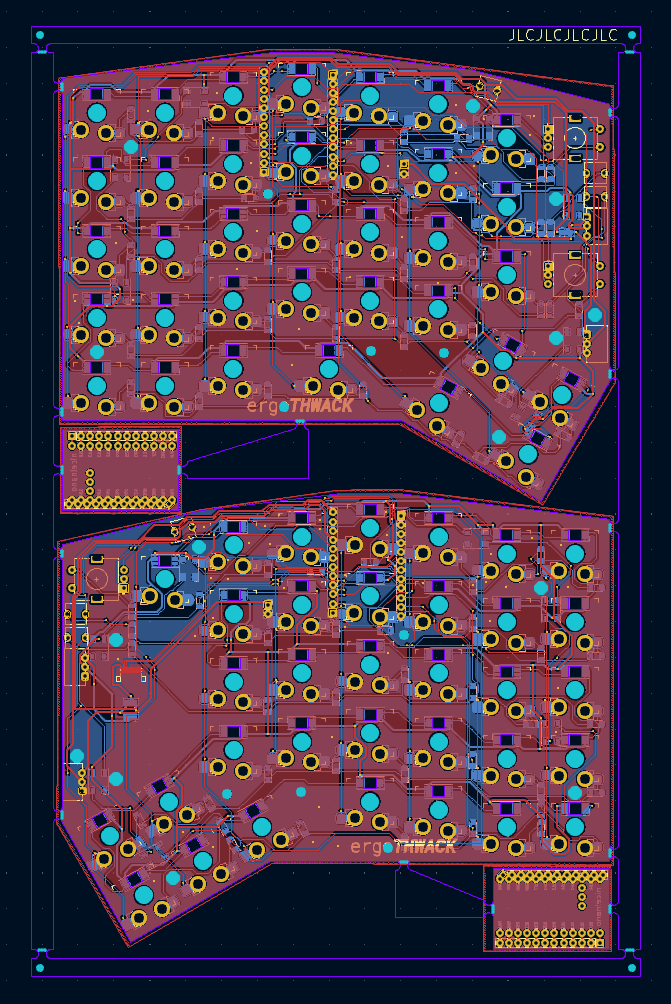
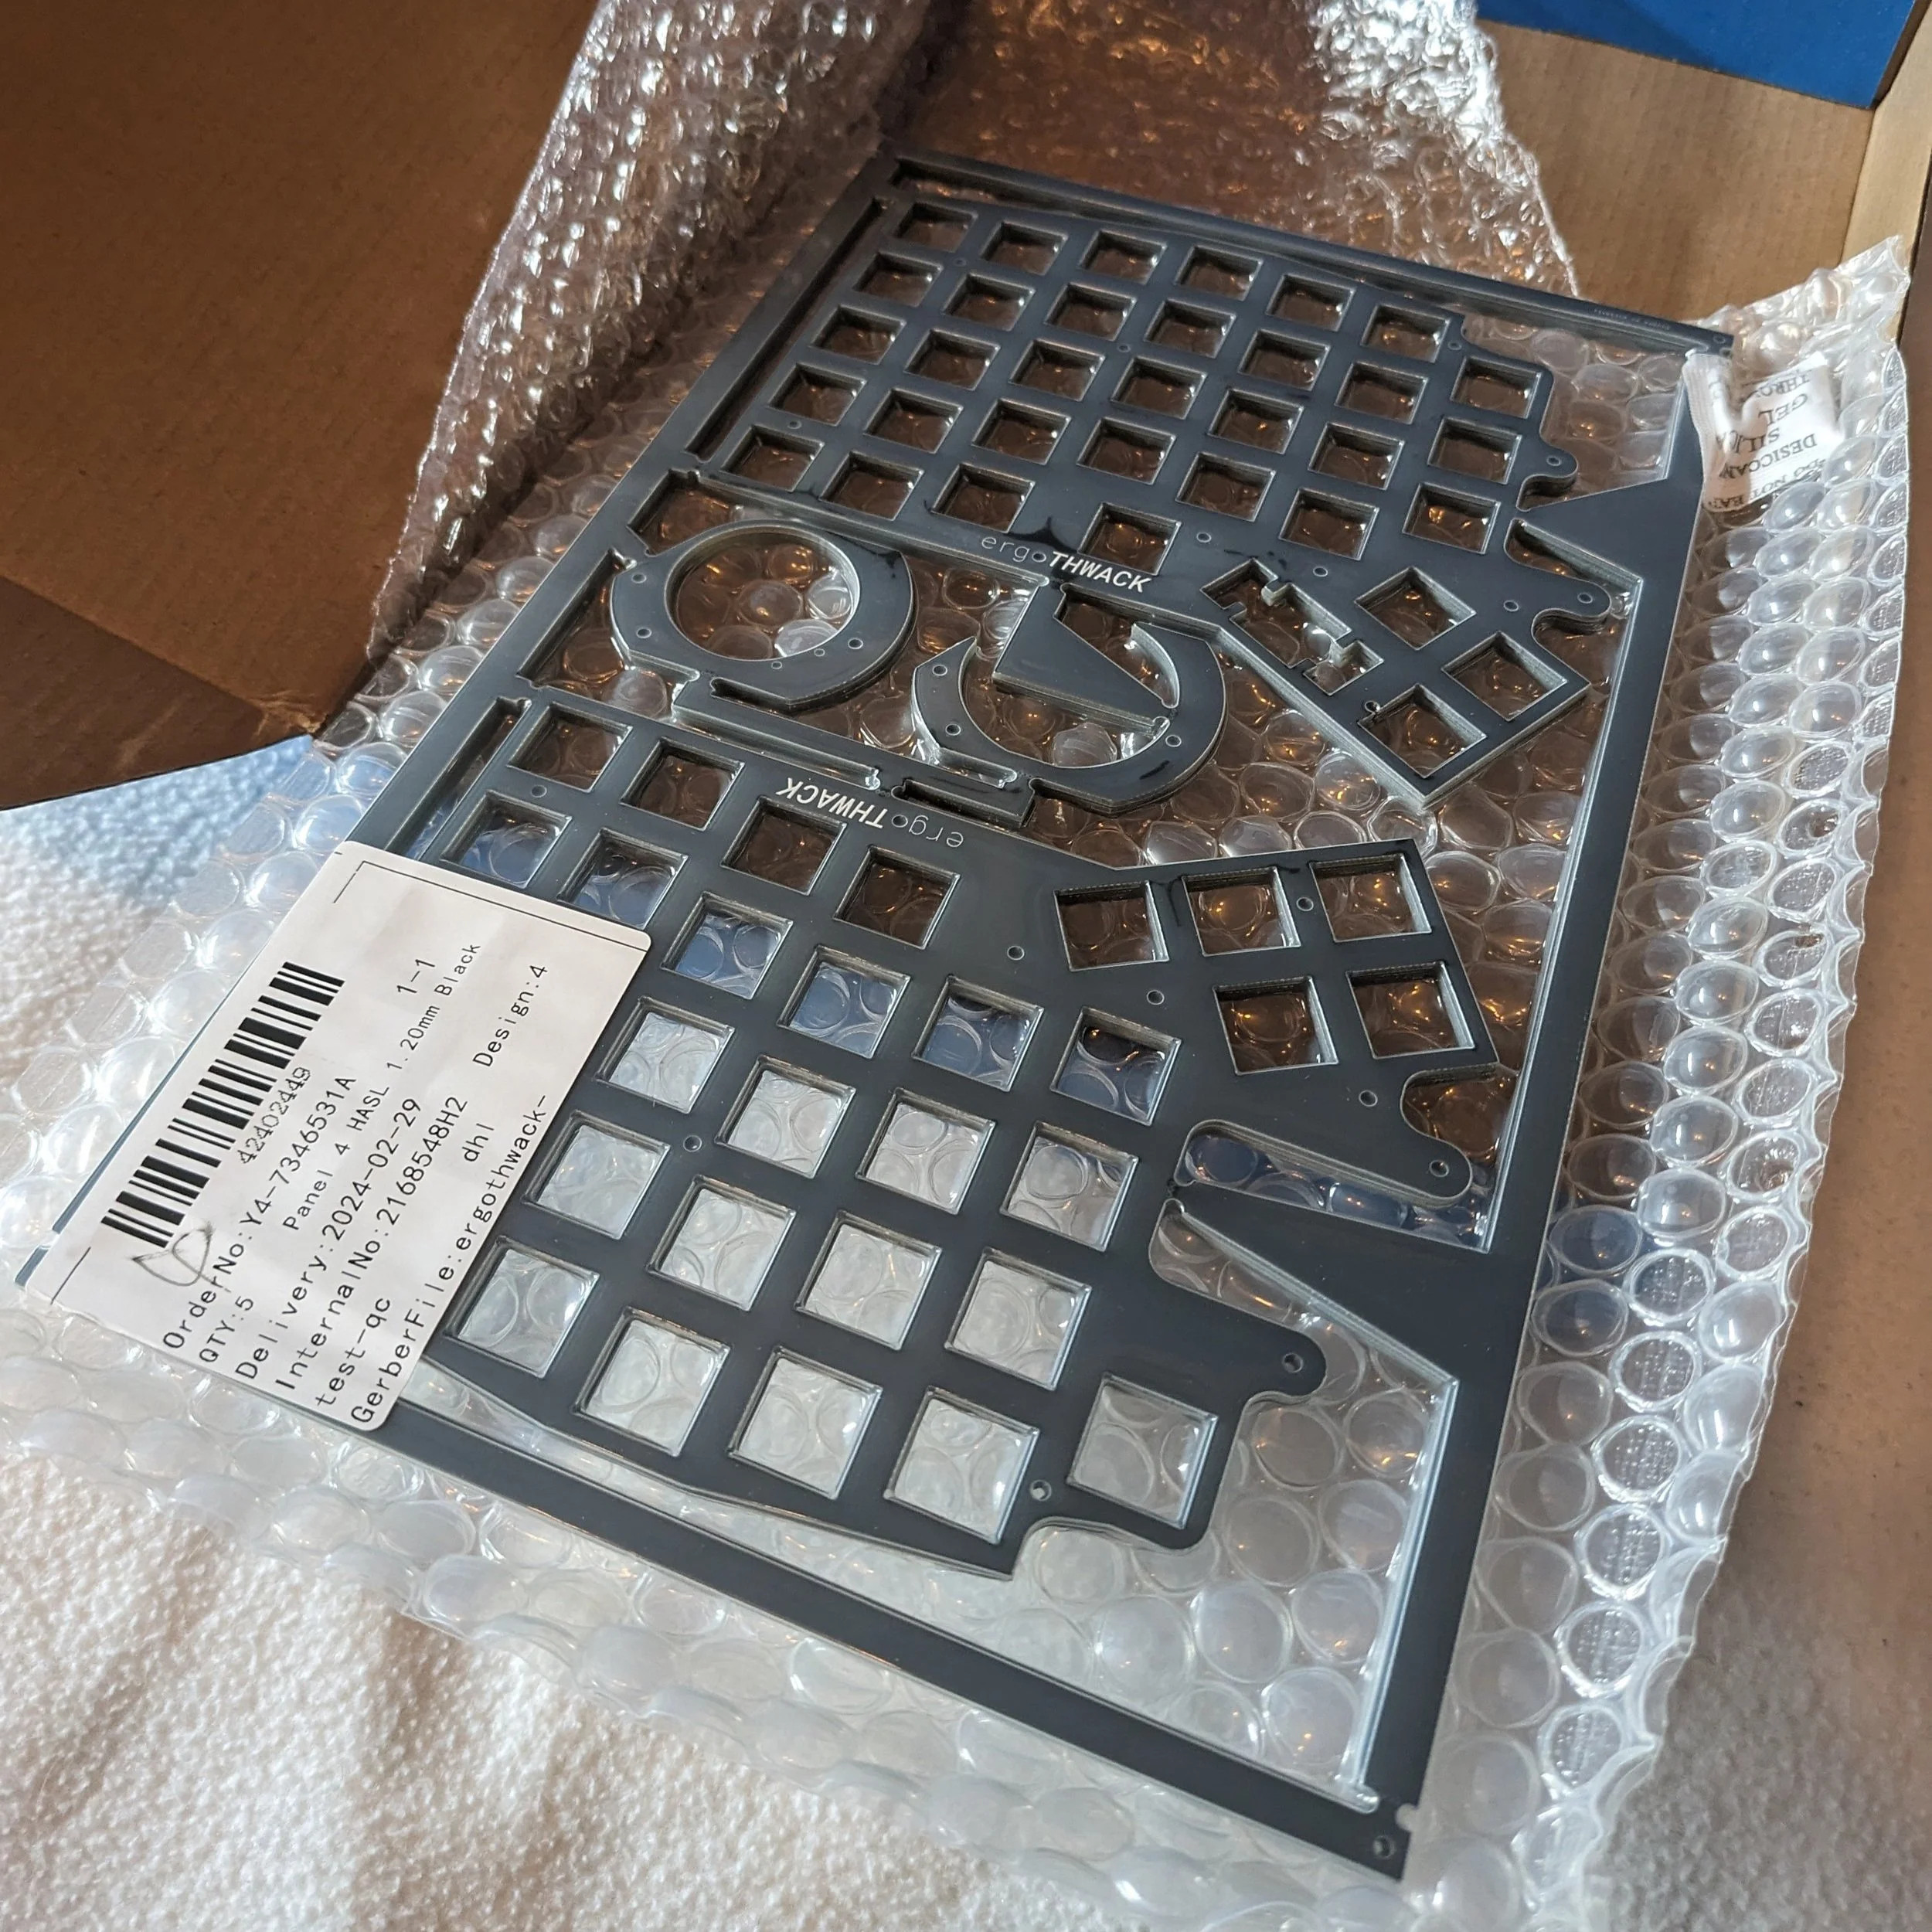
From here, there were many more minute decisions to make as I put together the circuit and board designs together in KiCAD, and the other custom flat part designs in Autodesk Fusion. I wanted to be able to order out all the custom components so the design was accessible for anyone to make, so these parts I designed so they could all be fabricated at JLCPCB and SendCutSend - limiting my component material, thickness, and design choices.


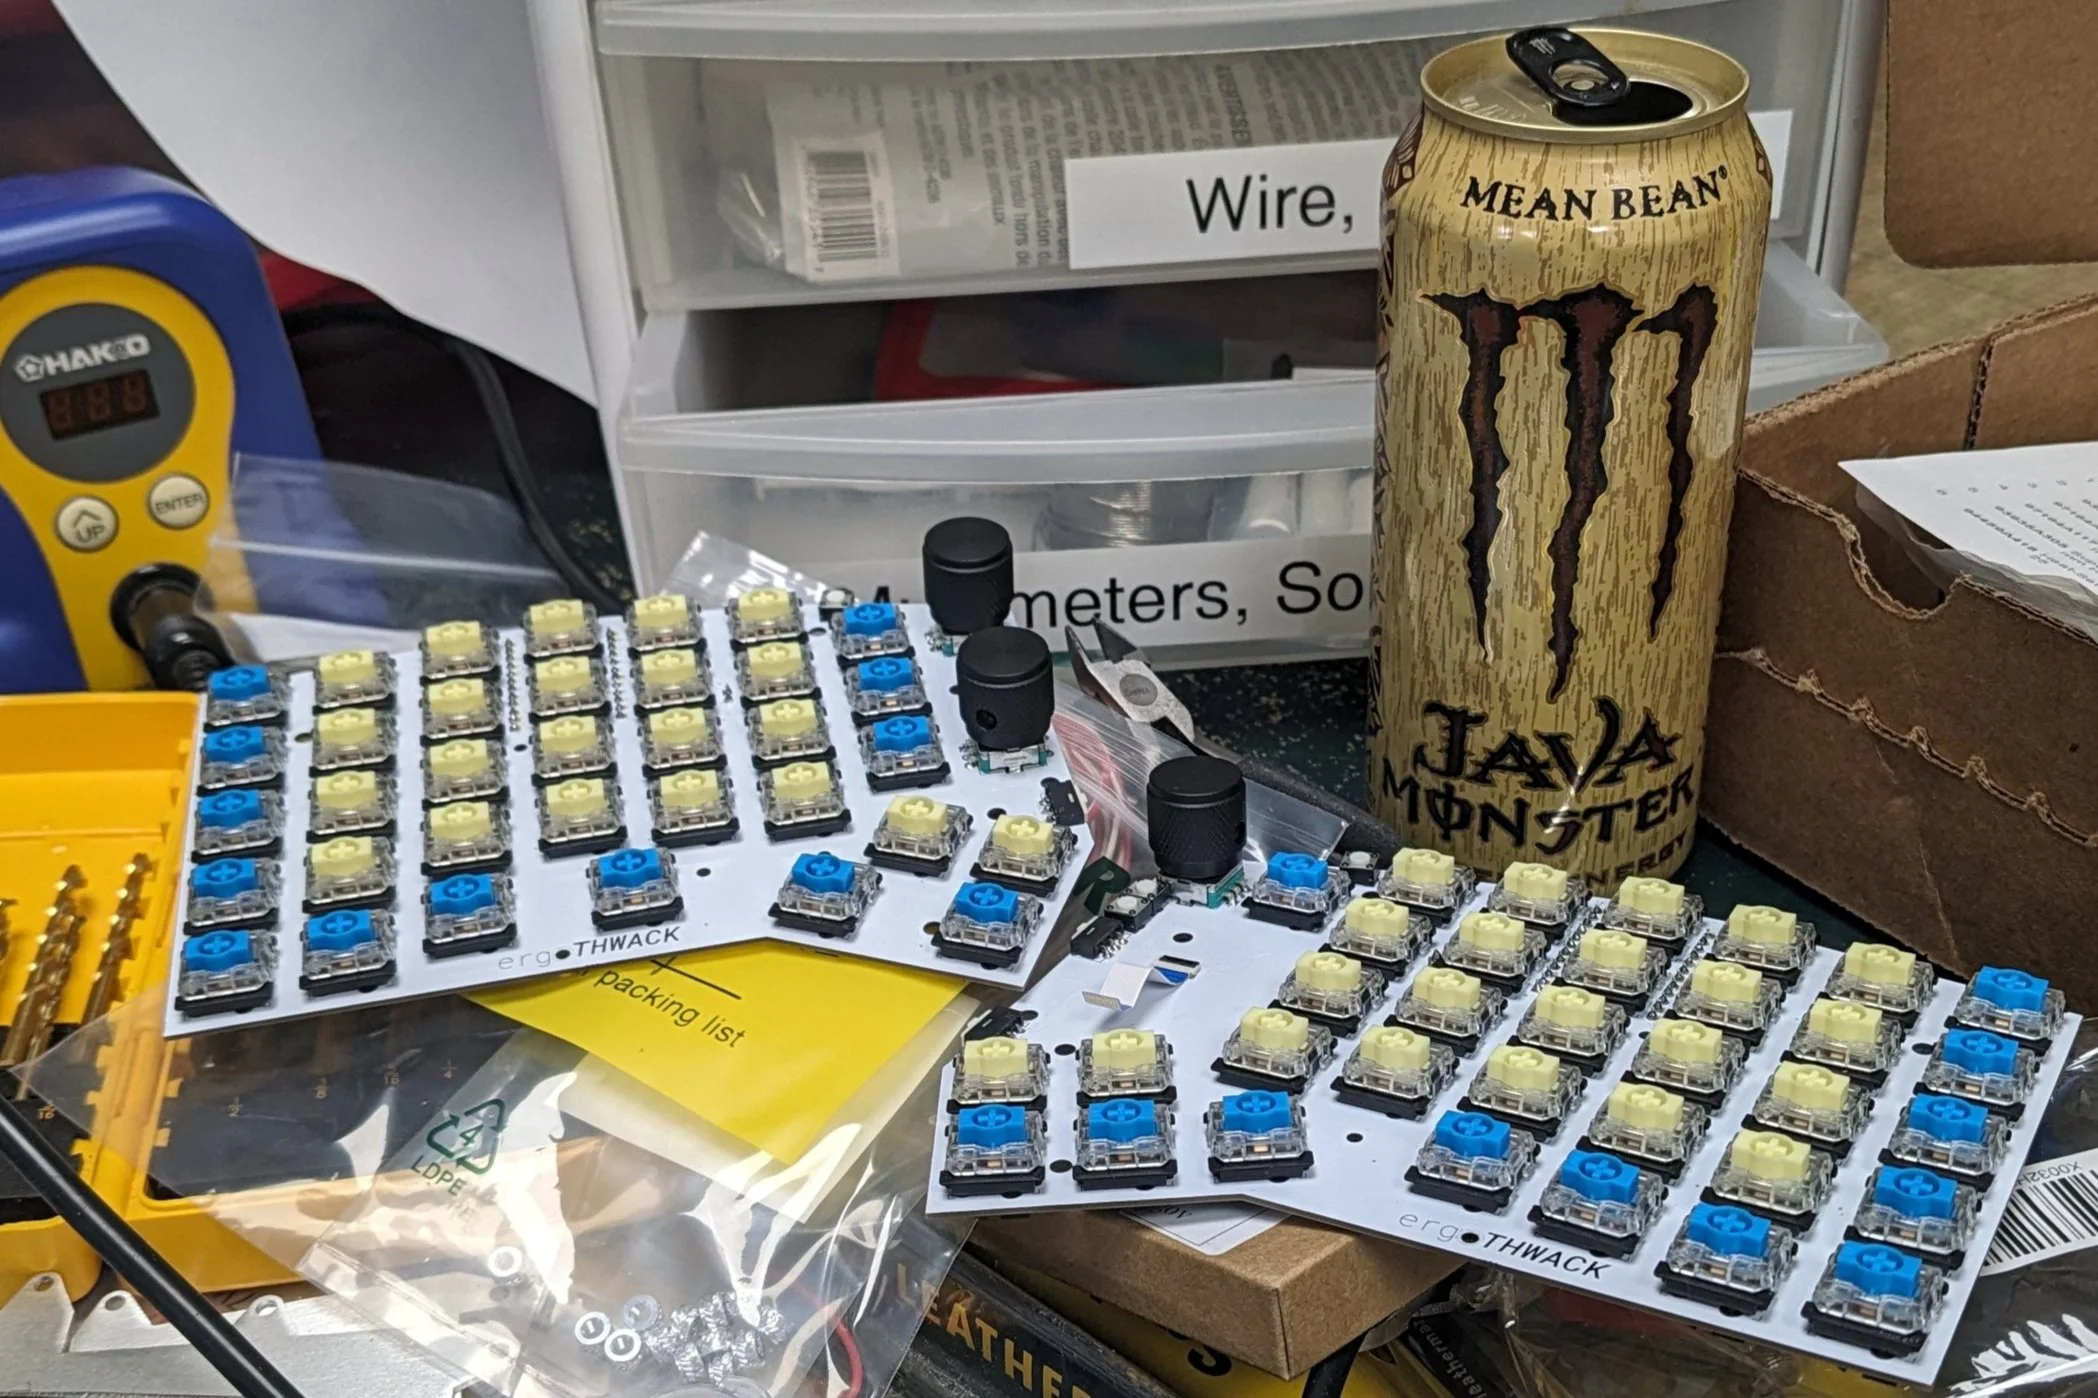
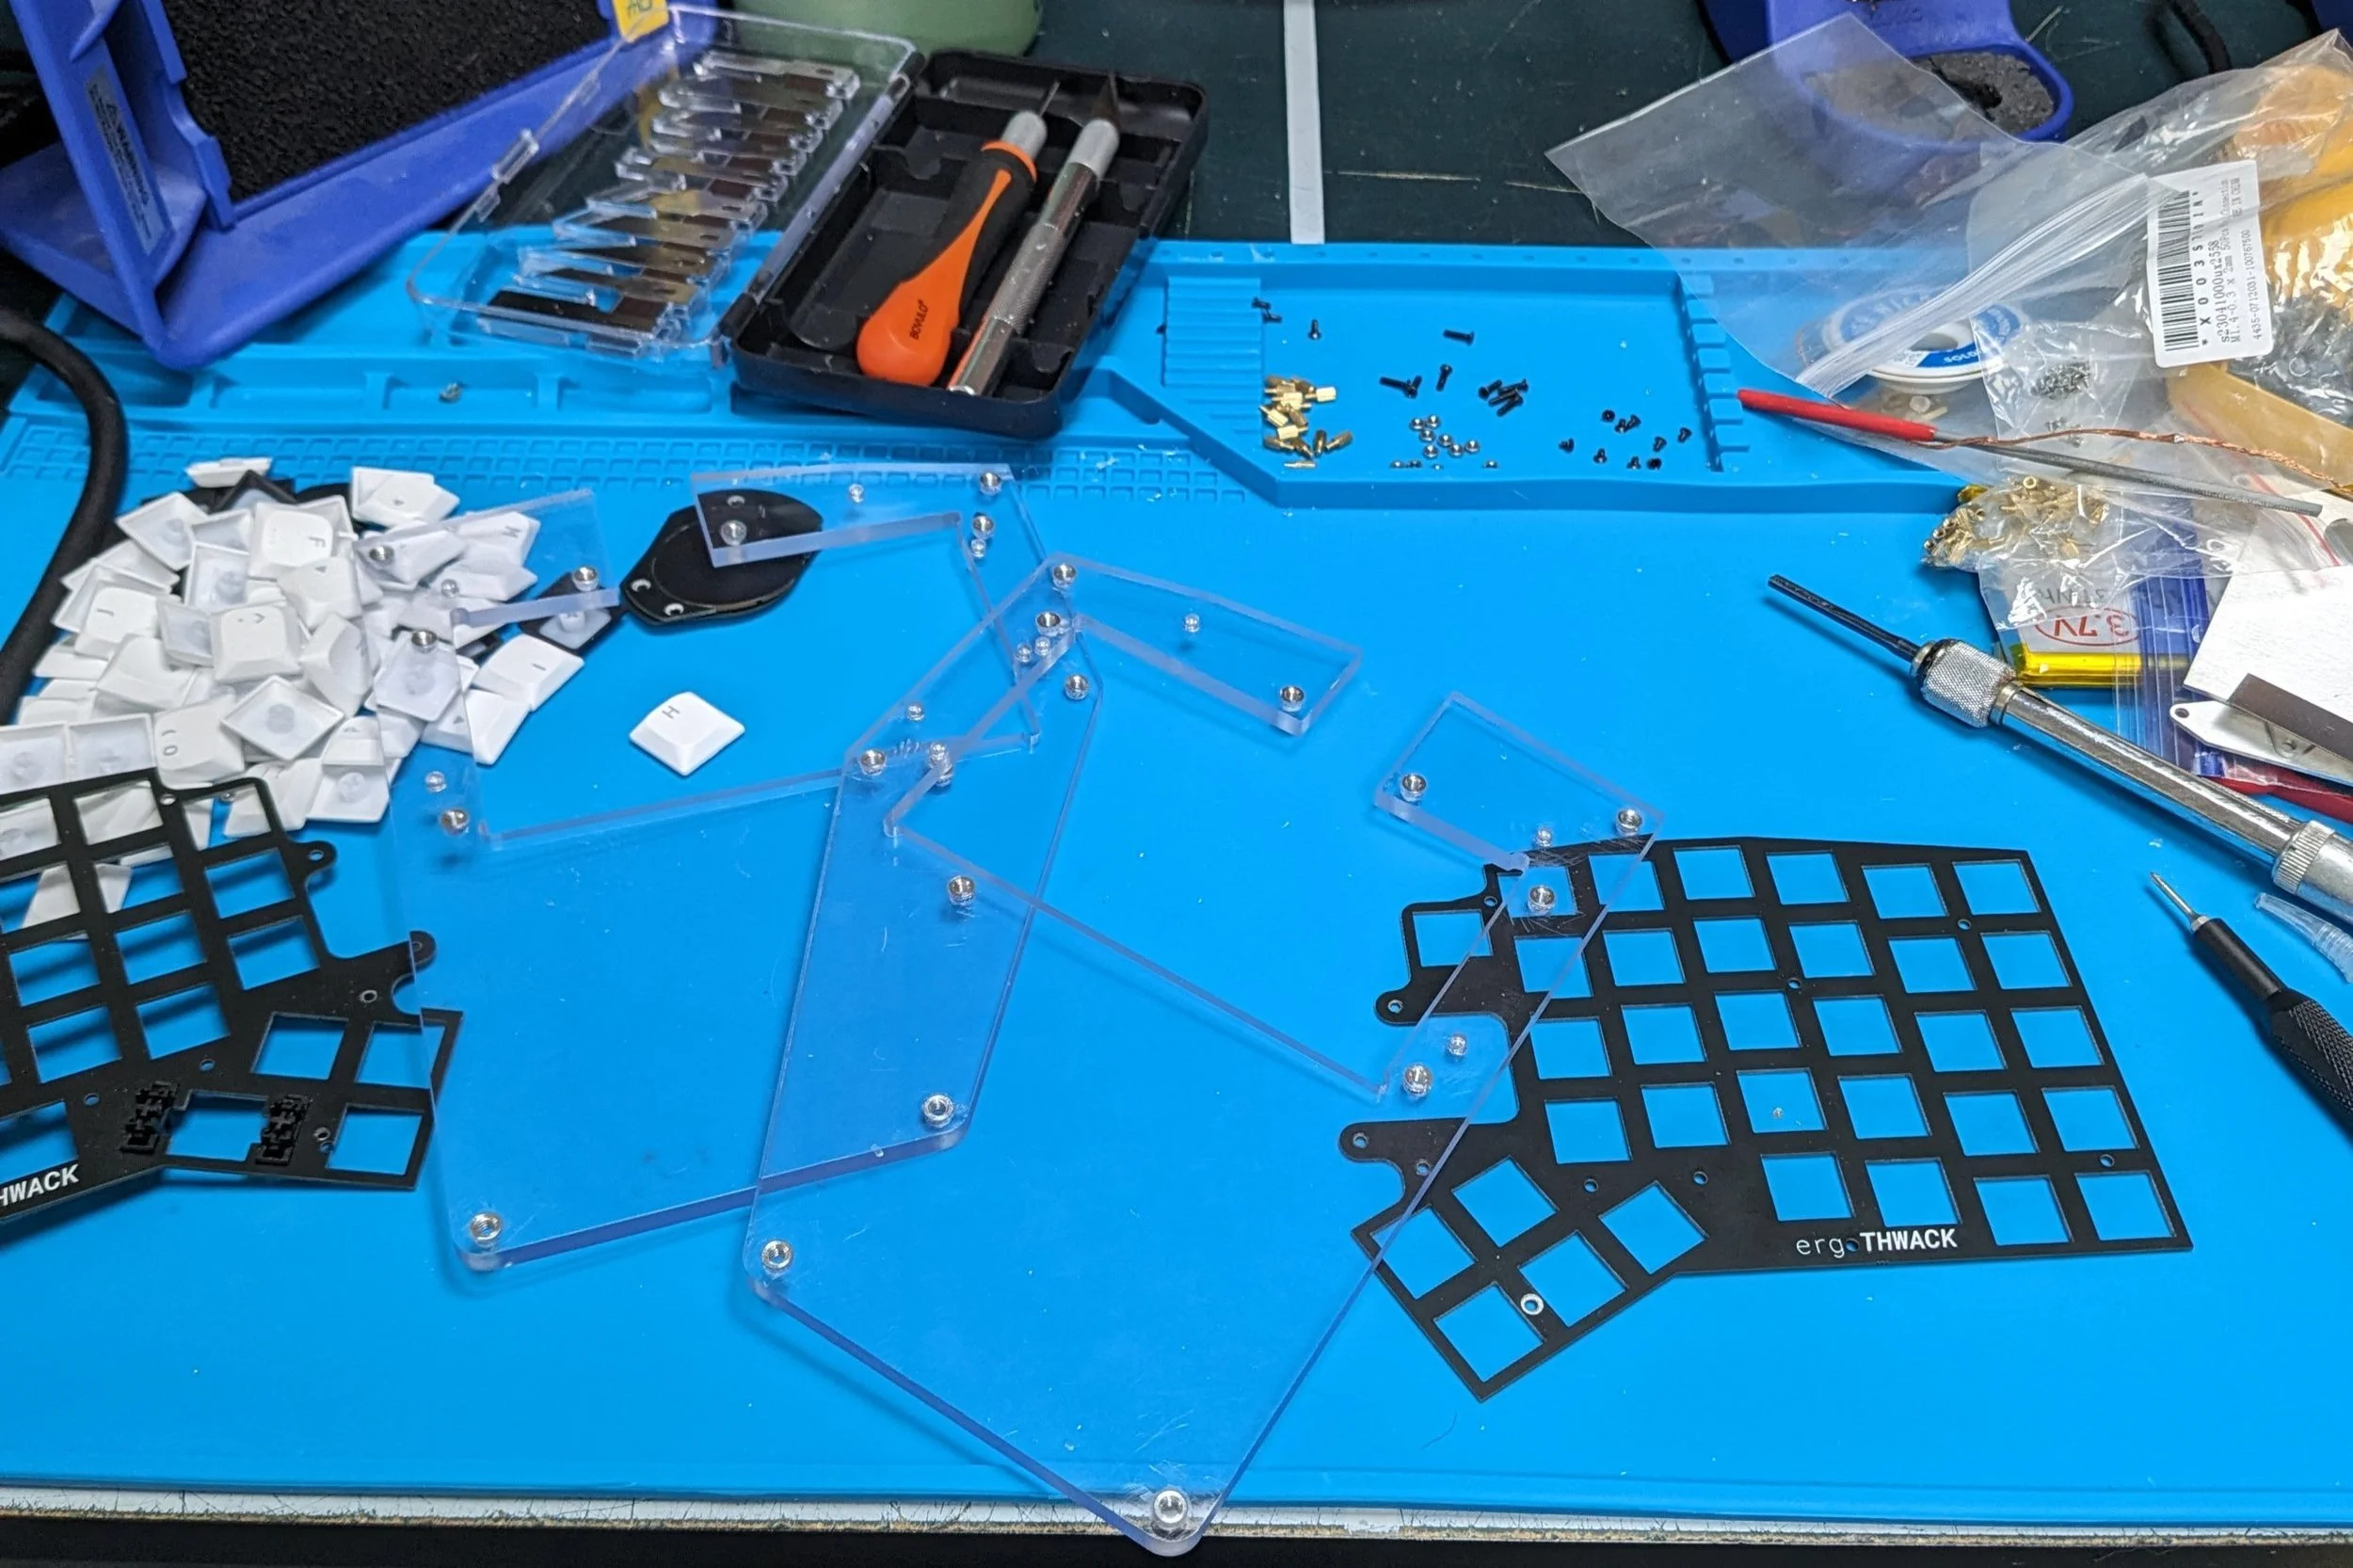
As I received the components for my beta ergoTHWACK, I got to work assembling them. I was able to get it all together, cataloging a few design issues along the way. A couple of them did complicate assembly, but most of the issues are minor tweaks I’ll be addressing with the upcoming v1 revision! You can follow my progress on v1 on this page and on my main hardware repository for the project here.
It took a bit of time to develop the shield support for my design with ZMK, the popular firmware for wireless keyboard builds, especially using the nice!nano nrf52 board like I am. Support for mouse input is still in beta in ZMK, so it’s not yet well documented, which made it tricky, but doable thanks to the generous support of the ZMK contributors and community on Discord.
While I was putting together the beta prototype, I decided to include a key to toggle the mouse cursor speed, however no one had yet developed a solution for this that worked with my trackpad. Fortunately, I was able to hack in this functionality by making a fork of the ZMK beta repository and develop a new “behavior” in the firmware. Since I made a fork, I was also able to merge a patch for a known issue with LED synchronization on split keyboards.


Overall, the experience of using my keyboard has been great, and has helped quite a bit with using my computer. However, as I expected with testing the beta ergoTHWACK, I’ve come across a few experience design issues that will need addressing in v1:
Using the rotary encoder above the touchpad as a scroll wheel works, however scrolling with the side of your finger, as is necessary to use it without lifting up your hand, is tricky and awkward.
Pressing this rotary encoder as the middle mouse button does not work well: the switches on the encoders take substantial force to press, which makes it difficult to do 3D navigation in CAD software where pressing the middle mouse button while doing mouse movement, now with the touchpad, is hard.
The offset position of the delete key is not as accessible to my thumb as I expected when testing the layout on paper, and I find myself using my left middle finger to access it anyway, which requires sideways movement with it offset.
Readily available keycap sets do not have a convex (typical for spacebars) 2U keycap.
With the trackpad, the mouse cursor is either too slow or too imprecise. I planned for this with the cursor speed toggle key, but I find it unpleasant to use, even after mapping it in a more accessible location.
Only low-profile MX-style keycaps fit, due to the top plate positioning I had to use, due to the 2U stabilizer needing a hole in the PCB that I didn’t include in the design.
The battery life at 20% burn per day is low for a wireless keyboard, and the 500mA charging from the nice!nano is a low rate for a 10000mAh battery.
These experiential issues are in addition to some issues with the beta design that complicated assembly, some of which I described in the captions of the photos above.
Here are my in-progress changes for the v1 ergoTHWACK to address the UX issues:
For the scroll wheel, I’m working on finding a horizontal encoder setup like that on a mouse, that will fit in the location of one key (18mm square). The other possibility I’m looking into is using this 4-way joystick, explicitly designed to work on control devices using key switches, and takes MX keycaps.
If I find or design a mouse scroll wheel assembly that works, the middle button will be part of it. Otherwise, like in the case of the joystick, I’ll have to decide on a keymapping or other alternative.
I’m going to move the delete key to the middle finger column, mirroring the position of the left arrow on the right half of the keyboard.
2.25U spacebars are readily available in keycap sets, and there is adequate space to tweak the thumb cluster design minimally to accommodate a 2.25U one where the 2U one is now (to make this work, the delete key had to move anyways).
I’m looking into solving the cursor speed problem by either:
Developing trackpoint-style cursor control for the touchpad, requiring adding code to activate and read absolute-mode data to the Zephyr (the realtime OS ZMK is built on) touchpad device driver, and implement or adapt the cursor behavior in ZMK.
Developing a module to add inertial mouse cursor control to ZMK.
The v1 revision includes the required hole in the PCB for the stabilizer, which should allow standard keycaps to work.
I’m looking into auxiliary charging solutions and RGB LEDs and controllers that can improve charge rates and battery consumption respectively.
Stay tuned for more updates! 😁
ergoTHWACK summary and technical details:
Based on the design of the ErgoDash, with the Corne GLP used as a reference.
The namesake: an added 2U (beta, 2.25 v1) thwack-able spacebar designed for usability in typing and WASD gaming.
Wireless, using the nice!nano controller board for low-energy Bluetooth.
Hot-swappable Gateron KS-33 low profile switches.
Running the ZMK firmware.
35 keys on the left, 34 keys on the right for a total of 69 keys.
2 rotary encoders on the left, 1 on the right, all 3 with buttons.
LED backlit keys, 7 underglow LEDs on each side, and a 10000mAh battery on each side, using about 20% battery per full day usage with a lowered brightness setting.
2 tactile switches on each side intended for controlling LED patterns.
Reset tactile switch on each side.
A main power switch and an LED power switch on both sides. The LEDs are wired to VCC on the nice!nano so they can be deactivated during sleep.
Integrated wrist rest and tenting.
Explicitly designed so that the custom components can be directly ordered from JLCPCB and SendCutSend, and the parts can be ordered from Mouser, Amazon, and McMaster-Carr. The nice!nanos can be purchased from an authorized vendor, e.g. here.
Github links again for convenience:
My ZMK fork the ergoTHWACK is using, fixing a bug and adding a key to toggle cursor speed.